DIY Mold Inspection: A Visual, Tool-Less Guide to Spotting Red Flags
This is a DIY guide to home inspection with a focus on indoor air quality, mold, and health. But this method isn't just about health. It's about how well-built and well-maintained a house is, from its roof to its plumbing.
You can use it when looking for homes to rent or buy, or to assess your current home. It’s especially relevant for those with conditions like mold illness (CIRS), MCAS, POTS, allergies, or ME/CFS.
Screening Process
The first part of the inspection process involves screening listings online. Here are some tips for looking on websites for rentals or to buy.
1.) For rentals, be wary of homes that stay listed on the rental site for more than a couple weeks without being rented, especially in densely populated areas. Price history on Zillow will show this.
2.) Whether you’re looking to buy or rent, be wary of homes that were bought and sold frequently, more than a few times per decade. The fewer owners, the better. And be wary of homes that stay on the market for a while and get priced dropped. How long is “a while?” It depends on the current market. In a hot market, more than a month is pretty concerning. Check sale history on Redfin for this kind of information.

3.) The older a home is, the more of a chance it has historical water damage and mold. But newer homes can definitely have mold too, especially if the structural lumber wasn’t stored properly, or if it rained/snowed a lot during construction and the lumber wasn’t properly dried before the house was finished.
Now I’ll tell you the features I look for in homes themselves when doing healthy home assessments.
You can see some of these features in the pictures on the listing, but many can only be discovered in person.
Exterior Visual Inspection
I start by looking at the exterior of the house. I’m mainly looking for signs that water could be leaking into the structure and causing mold to grow behind the walls, floors, and ceilings, which can affect the health of the occupants even if it’s not visible from inside of the home, and even if moisture meters and infrared (thermal) cameras don’t detect signs of moisture. Visual inspection is a reliable safeguard.
I start at the ground and then move upward.
First, inspect the home’s foundation and siding:
a.) Check the slope of the ground around the home.
If the ground is sloping down towards the foundation, water can pool against and under the foundation. One way to prevent this is having the ground slope down from the foundation, 6 inches down measured from 10 feet away, ideally. To put it simply, the home should be the highest point on the property.

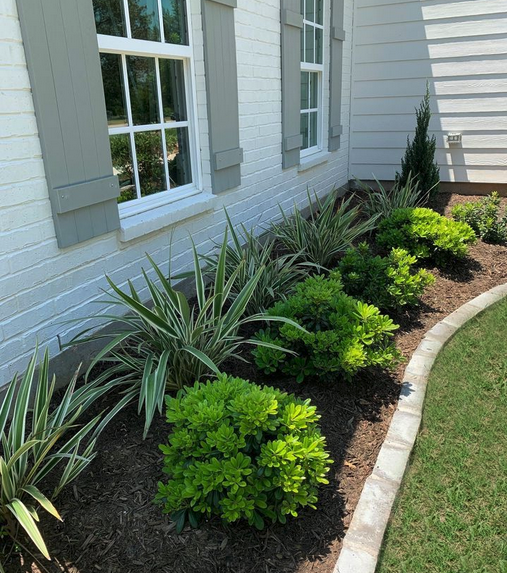
b.) Check for at least 2 feet of clear ground space around the home.
There should be no plants, mulch, or sprinklers within two feet of the exterior walls. Moisture and vegetation close to the structure increase the risk of mold, rot, and pest intrusion.
c.) Check for any discoloration on the foundation (rising damp).
Through capillary action, that water can wick up into the foundation, floor, and walls, and grow mold. This is called rising damp.


d.) Check that there are six inches of foundation exposed before the siding begins. Many houses don’t have this, unfortunately.

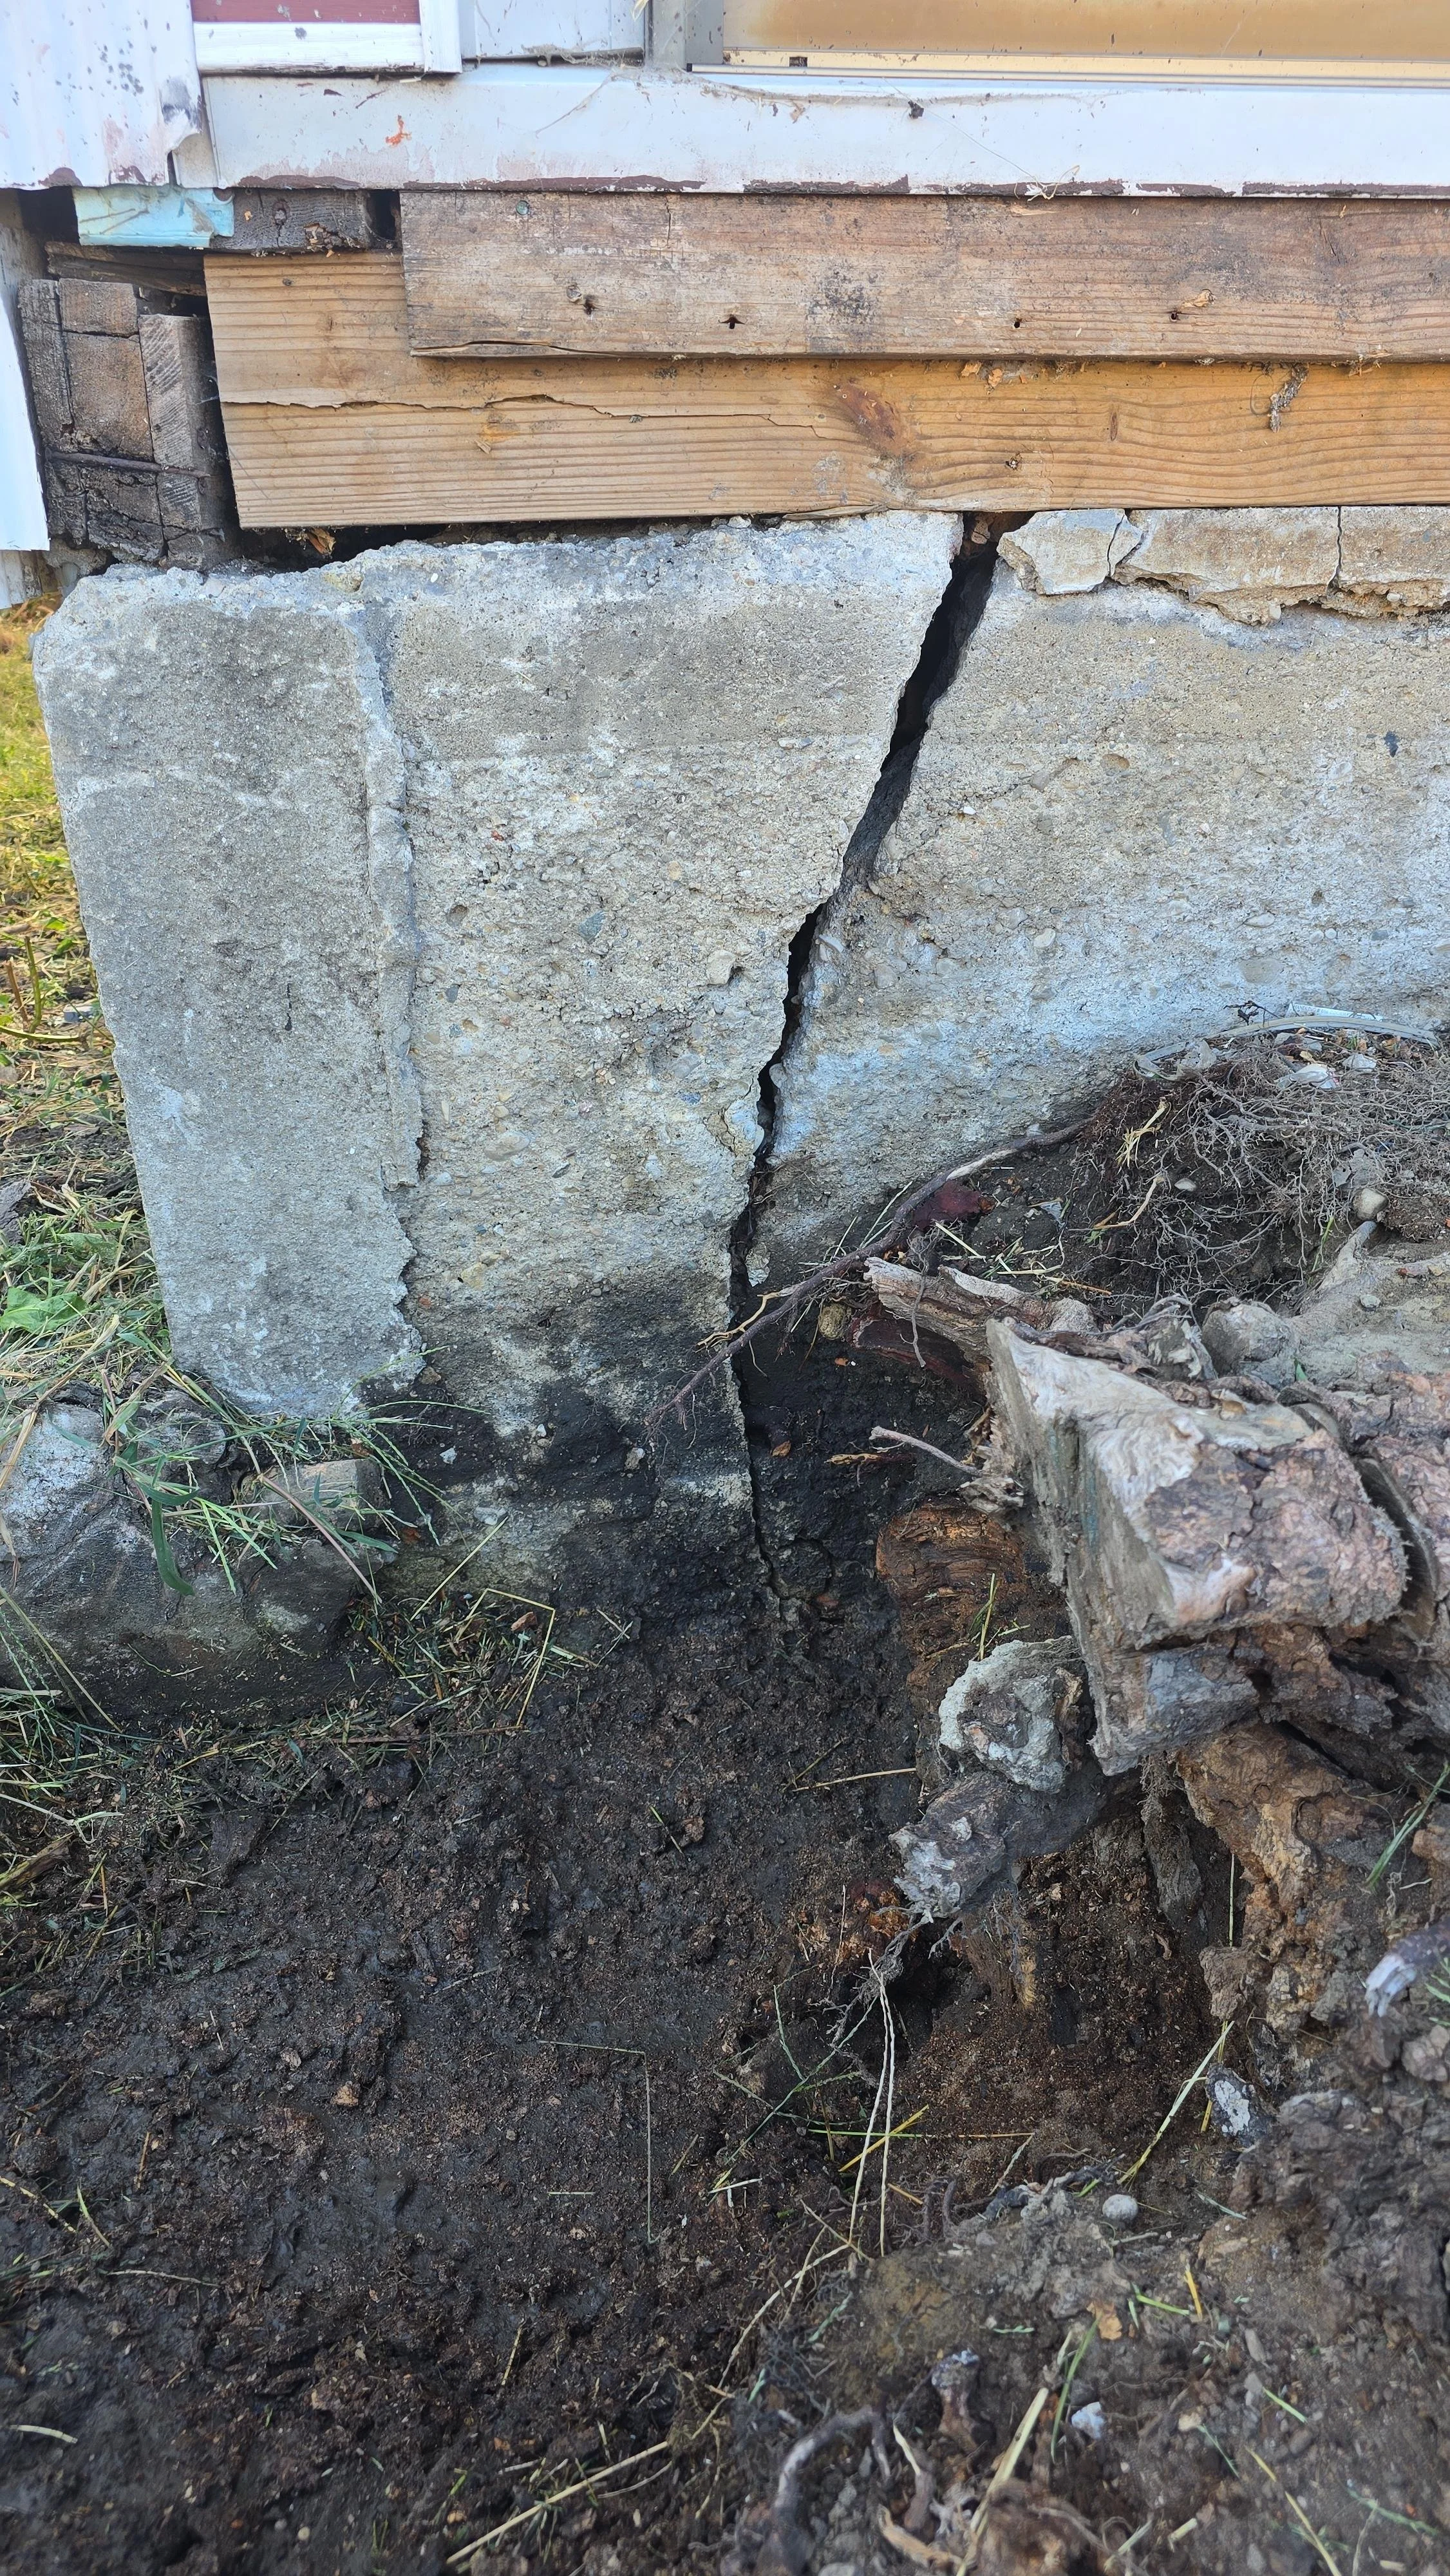
e.) Check for any cracks in the foundation.
Cracks can let water in.
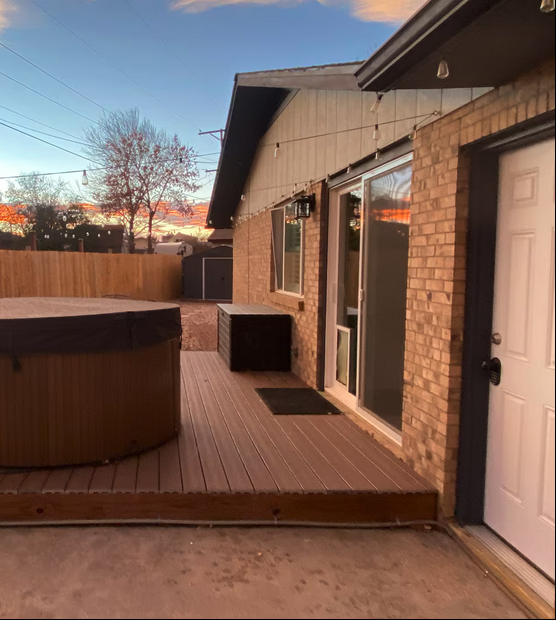
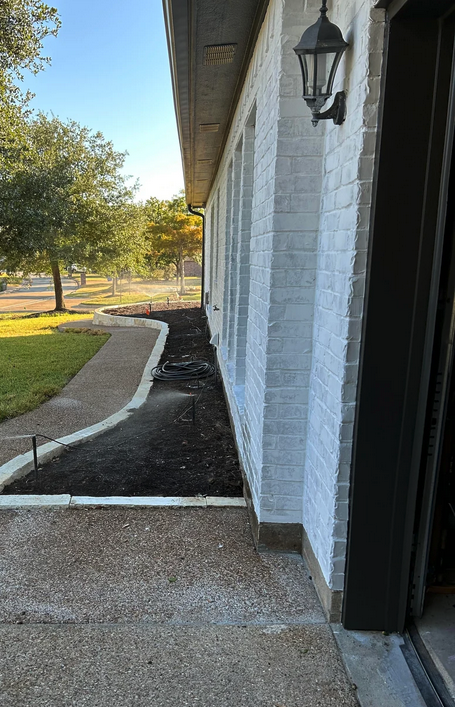
f.) Check for entrances at ground level with no elevation change.
Exterior doors should sit at least one step above the surrounding grade or patio surface. When doors are level with the ground, rainwater and snowmelt can enter or saturate the sill and wall base. The picture on the left is a properly elevated door, and the picture on the right is what it should NOT look like (door on the far right).

Second, inspect the home’s siding and windows:
a.) Check for any discoloration/staining on the siding.
Look where roofs meet walls especially. This can be a sign that water is leaking into the home.

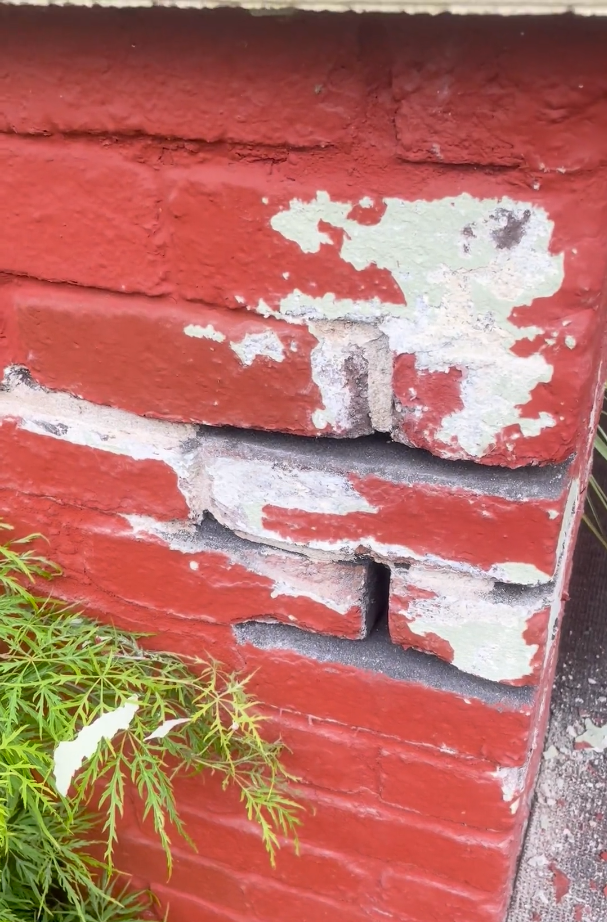
b.) Avoid painted brick exteriors.
Paint traps moisture inside the masonry by sealing the brick’s natural pores. This can cause spalling, efflorescence, and hidden mold behind the wall. Once brick is painted, it can’t dry properly and is difficult to restore.
Not all brick coatings are problematic though; mineral finish such as limewash or silicate paint are breathable. They allow vapor to pass through and usually have a flat, chalky look, unlike the glossy or plastic sheen of standard acrylic paint. The example on the left is the wrong kind of paint, on the right is the correct kind of paint (limewash).
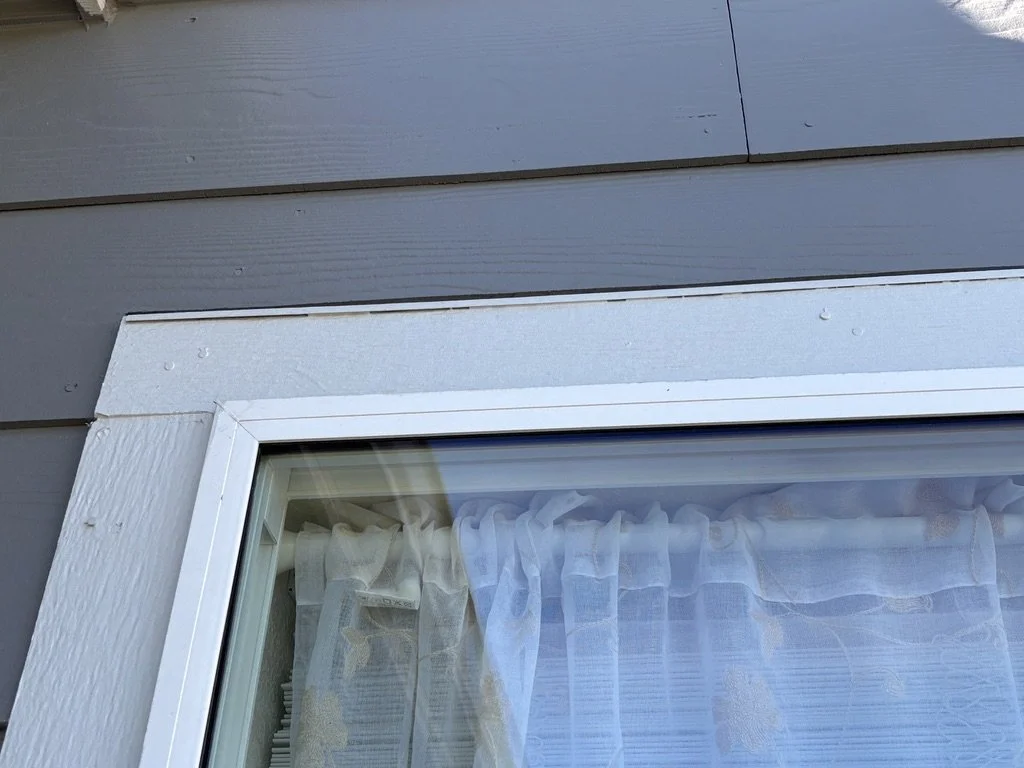
c.) Check for any cracking or discoloration around the windows.
If you’re seeing gaps, cracking, paint wearing away, or dirty streaks around the window trim or caulking, it could be a sign of water intrusion.
d.) Ensure that there is head flashing above the windows and other exterior penetrations.
It is a thin metal (or sometimes flexible) flashing installed above openings to direct water away from the top edge. It prevents rainwater from seeping behind the siding or trim.
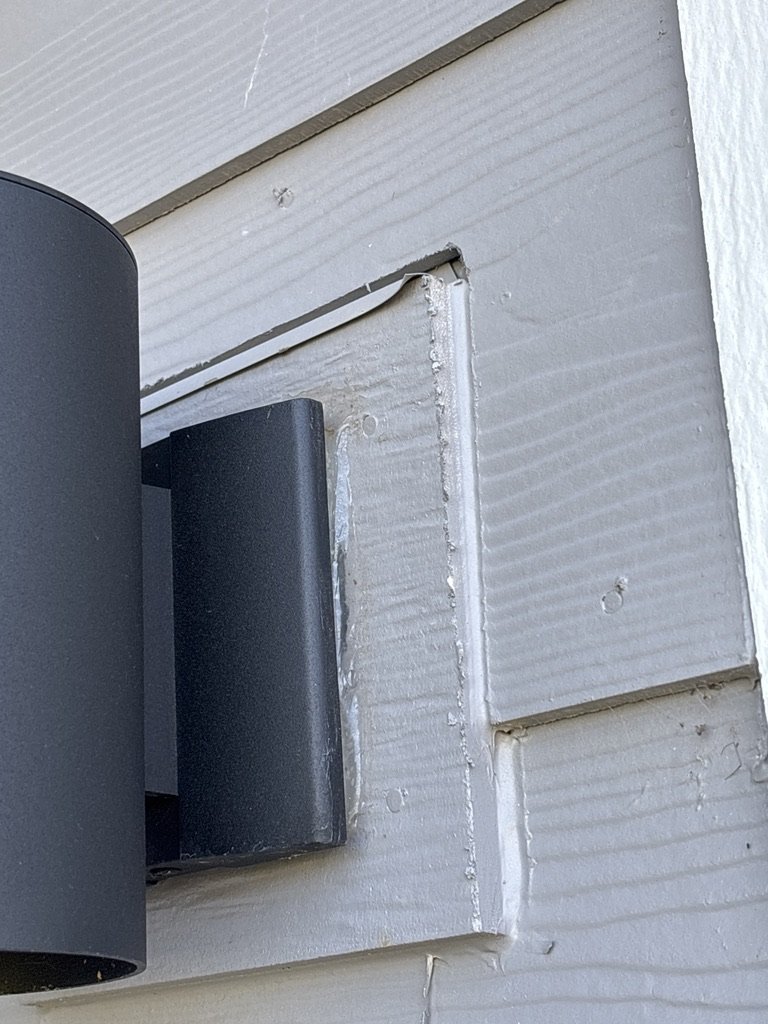
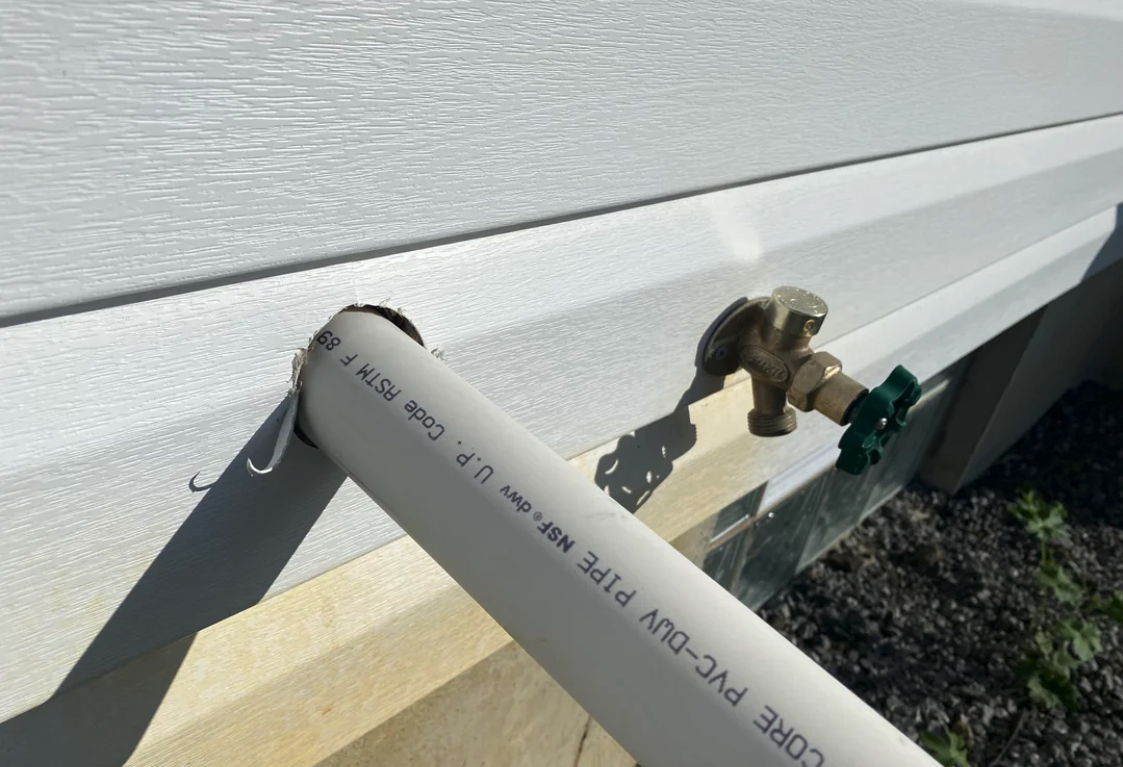
e.) Ensure that all exterior penetrations are well sealed.
Gaps around vents, lights, outlets, pipes, and wiring should be caulked or gasketed to prevent water and air leakage. Unsealed penetrations can allow moisture, insect, and rodent intrusion. The below example is a sump pump outflow that isn’t sealed at all, and should be.
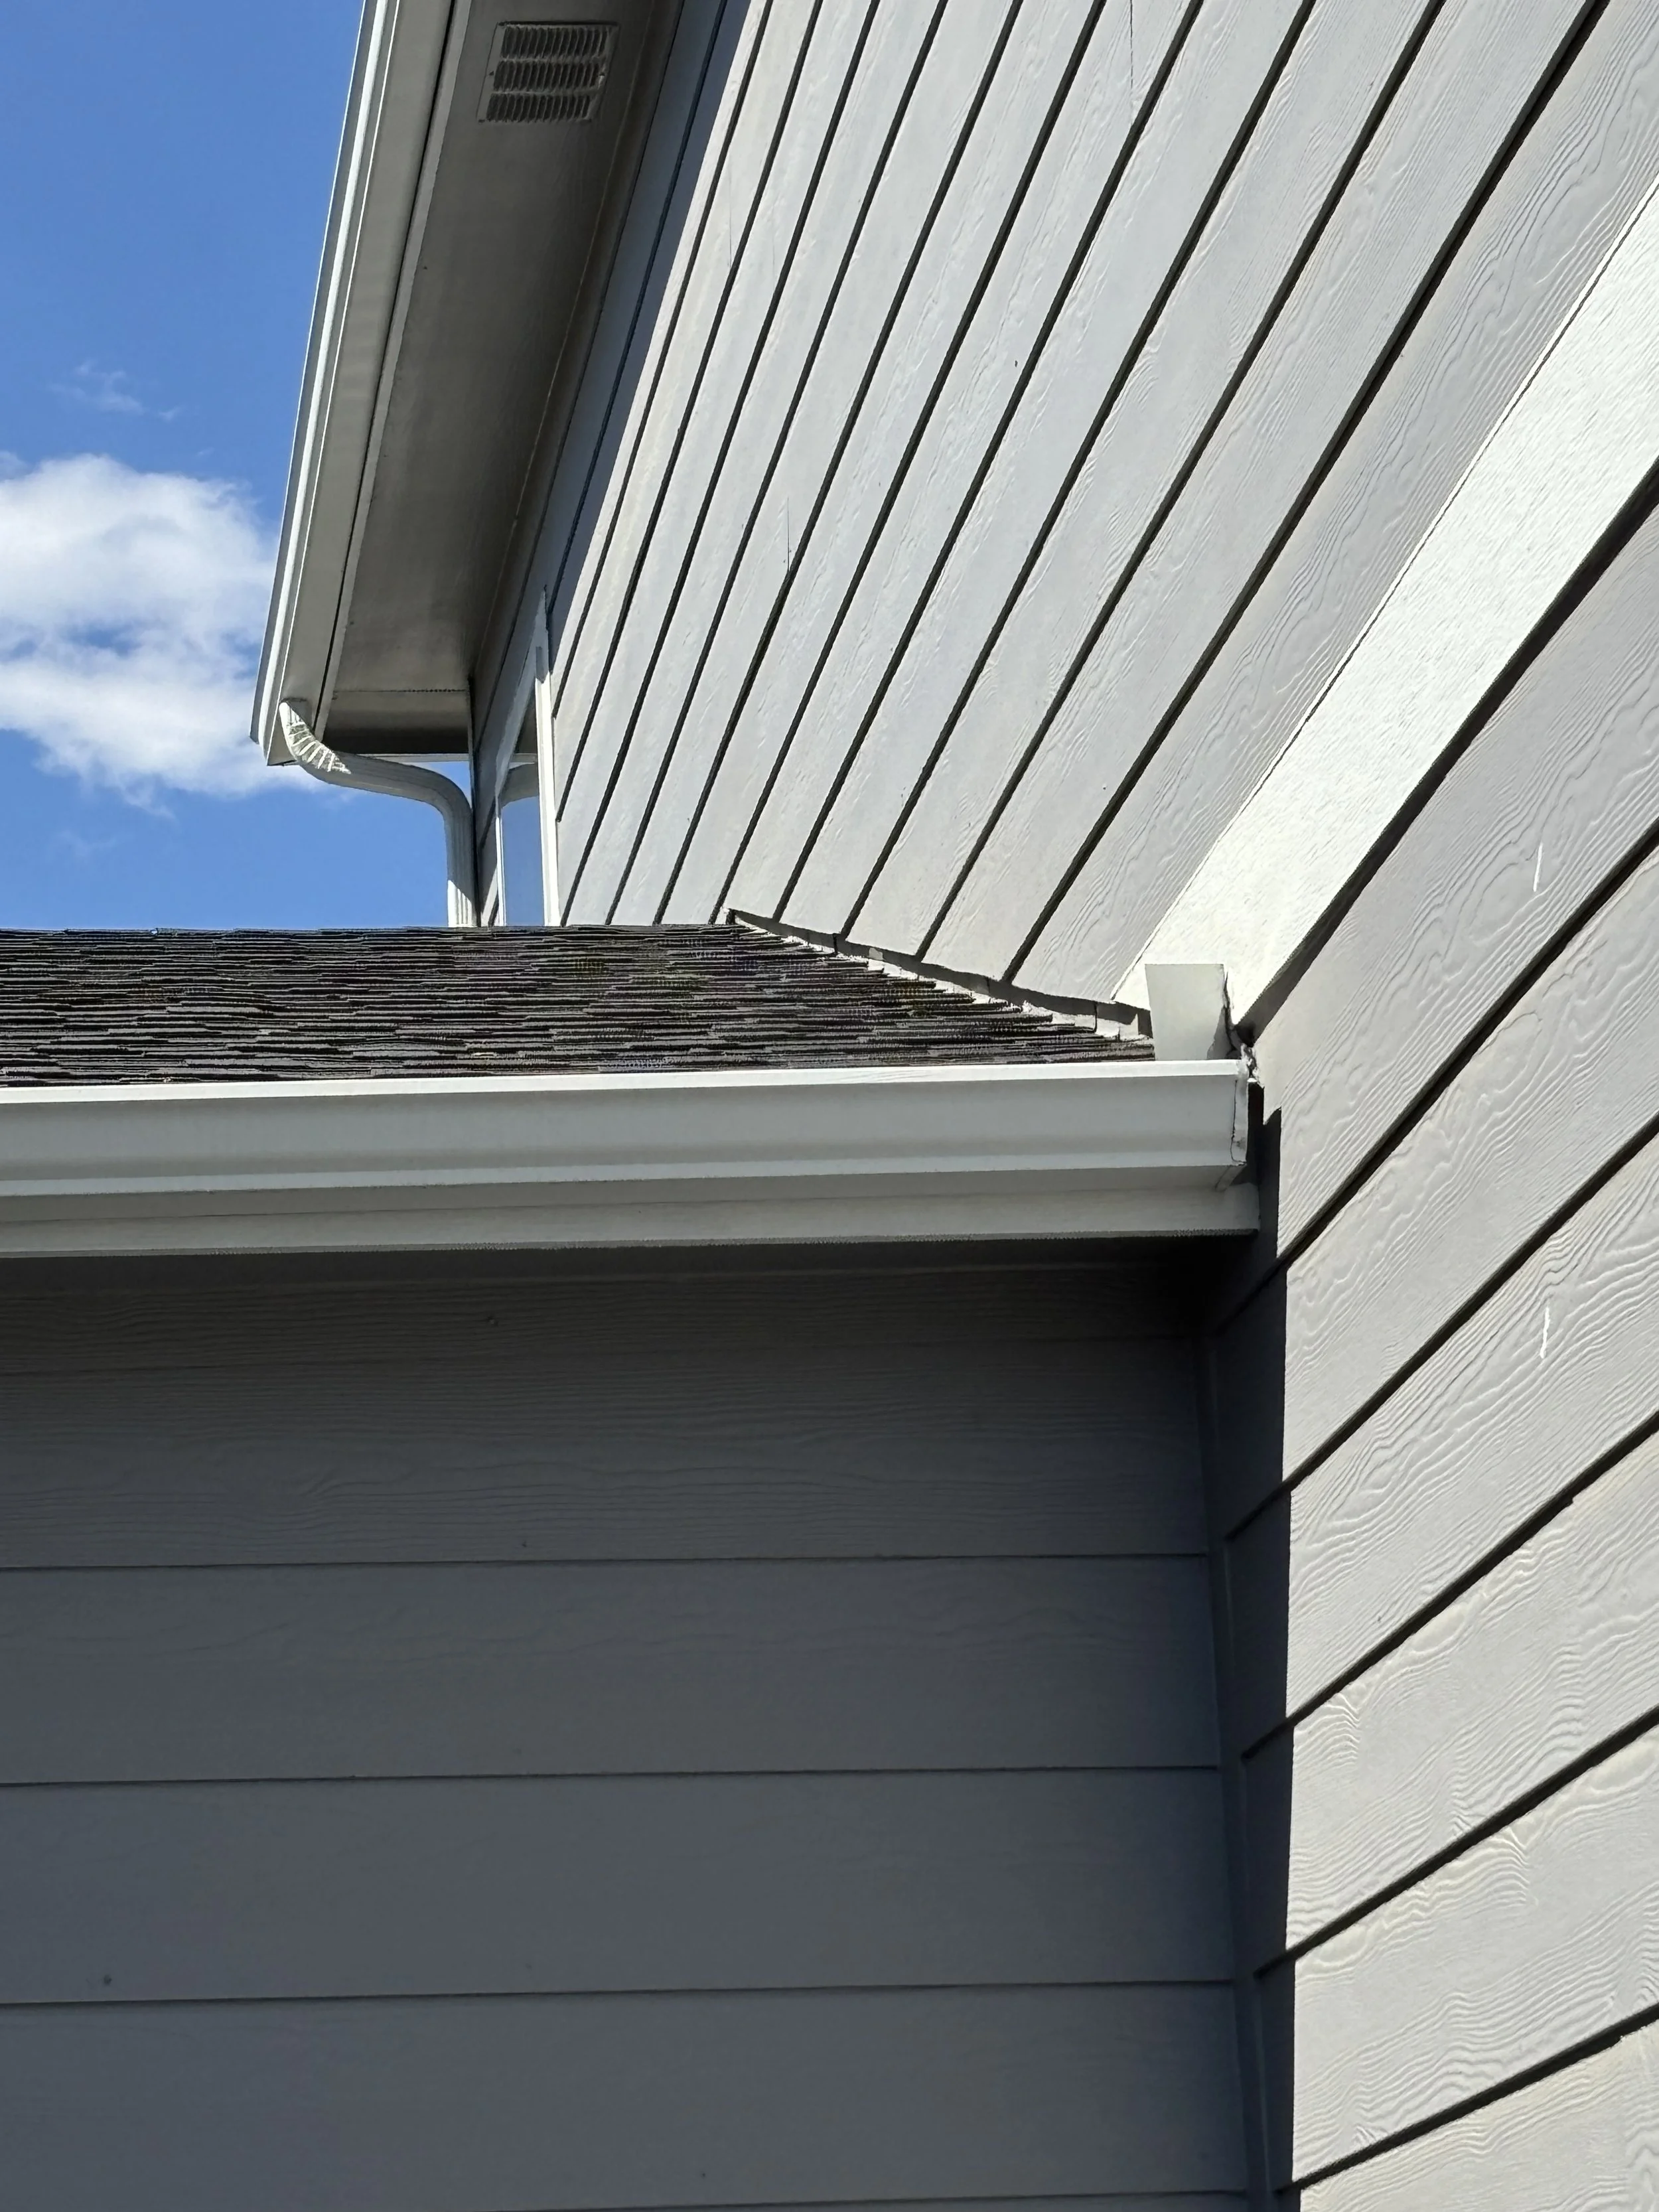
f.) Check that there is a 1-2 inch gap between the siding and the roof (a gap is good).
If siding sits directly on the roof, rainwater and snowmelt can wick up into it, leading to rot, mold, and structural damage. A gap ensures proper drainage and allows the flashing to work as intended.
Third, inspect the overhangs:
a.) Check the depth of the overhangs.
A Study of 46 homes found that almost 90% of the exterior walls with no overhang had water damage. In contrast, only 25% of the walls with a 2 foot overhang had problems. The deeper the overhang, the less of a chance weather-related water damage will occur.
Fourth, inspect the gutters and downspouts:
a.) Check the gutters.
First of all, the home should have gutters. Gutters belong on horizontal roof edges (the eaves), where rainwater flows off. If there’s no gutter along a long, low roof edge, that’s usually a red flag.
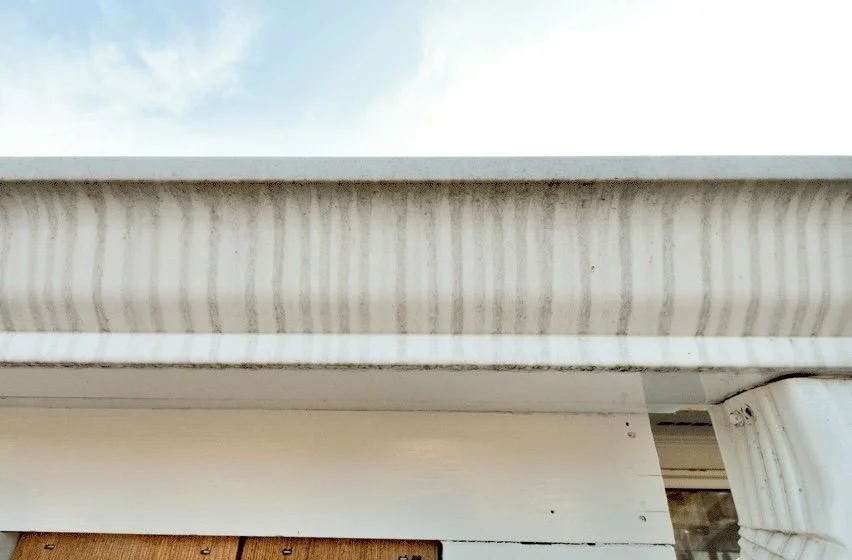
The gutters should be clean. If there are trees above the gutters, and they aren’t regularly cleaned, it’s likely they are clogged with tree debris.
One sign that the gutters are not working properly is if you see dirty streaks (drip stains) along the outside of them, showing that water has overflowed and leaked over the edge, as in the image below.
Another way is if your house has a second floor, go up there and look down into the gutters.
The most egregious sign of dirty gutters is if plants are growing from them.
b.) Check that the downspout extensions empty at least 6 feet from the foundation; 10 feet is optimal.
Downspout extensions need to dump water sufficiently far away from the foundation of the home. 10 foot extensions are rare - most are shorter than that. If the ground slopes downward away from your house, you can get away with shorter extensions. I wouldn’t go shorter than 4 feet though.

c.) Check that there is kickout flashing where a roof slope meets a wall and directs water into a gutter.
Kickout flashing prevents water from running behind the siding at roof-wall intersections. Without it, water can penetrate the wall, leading to hidden rot and mold. The image below shows proper kickout flashing.
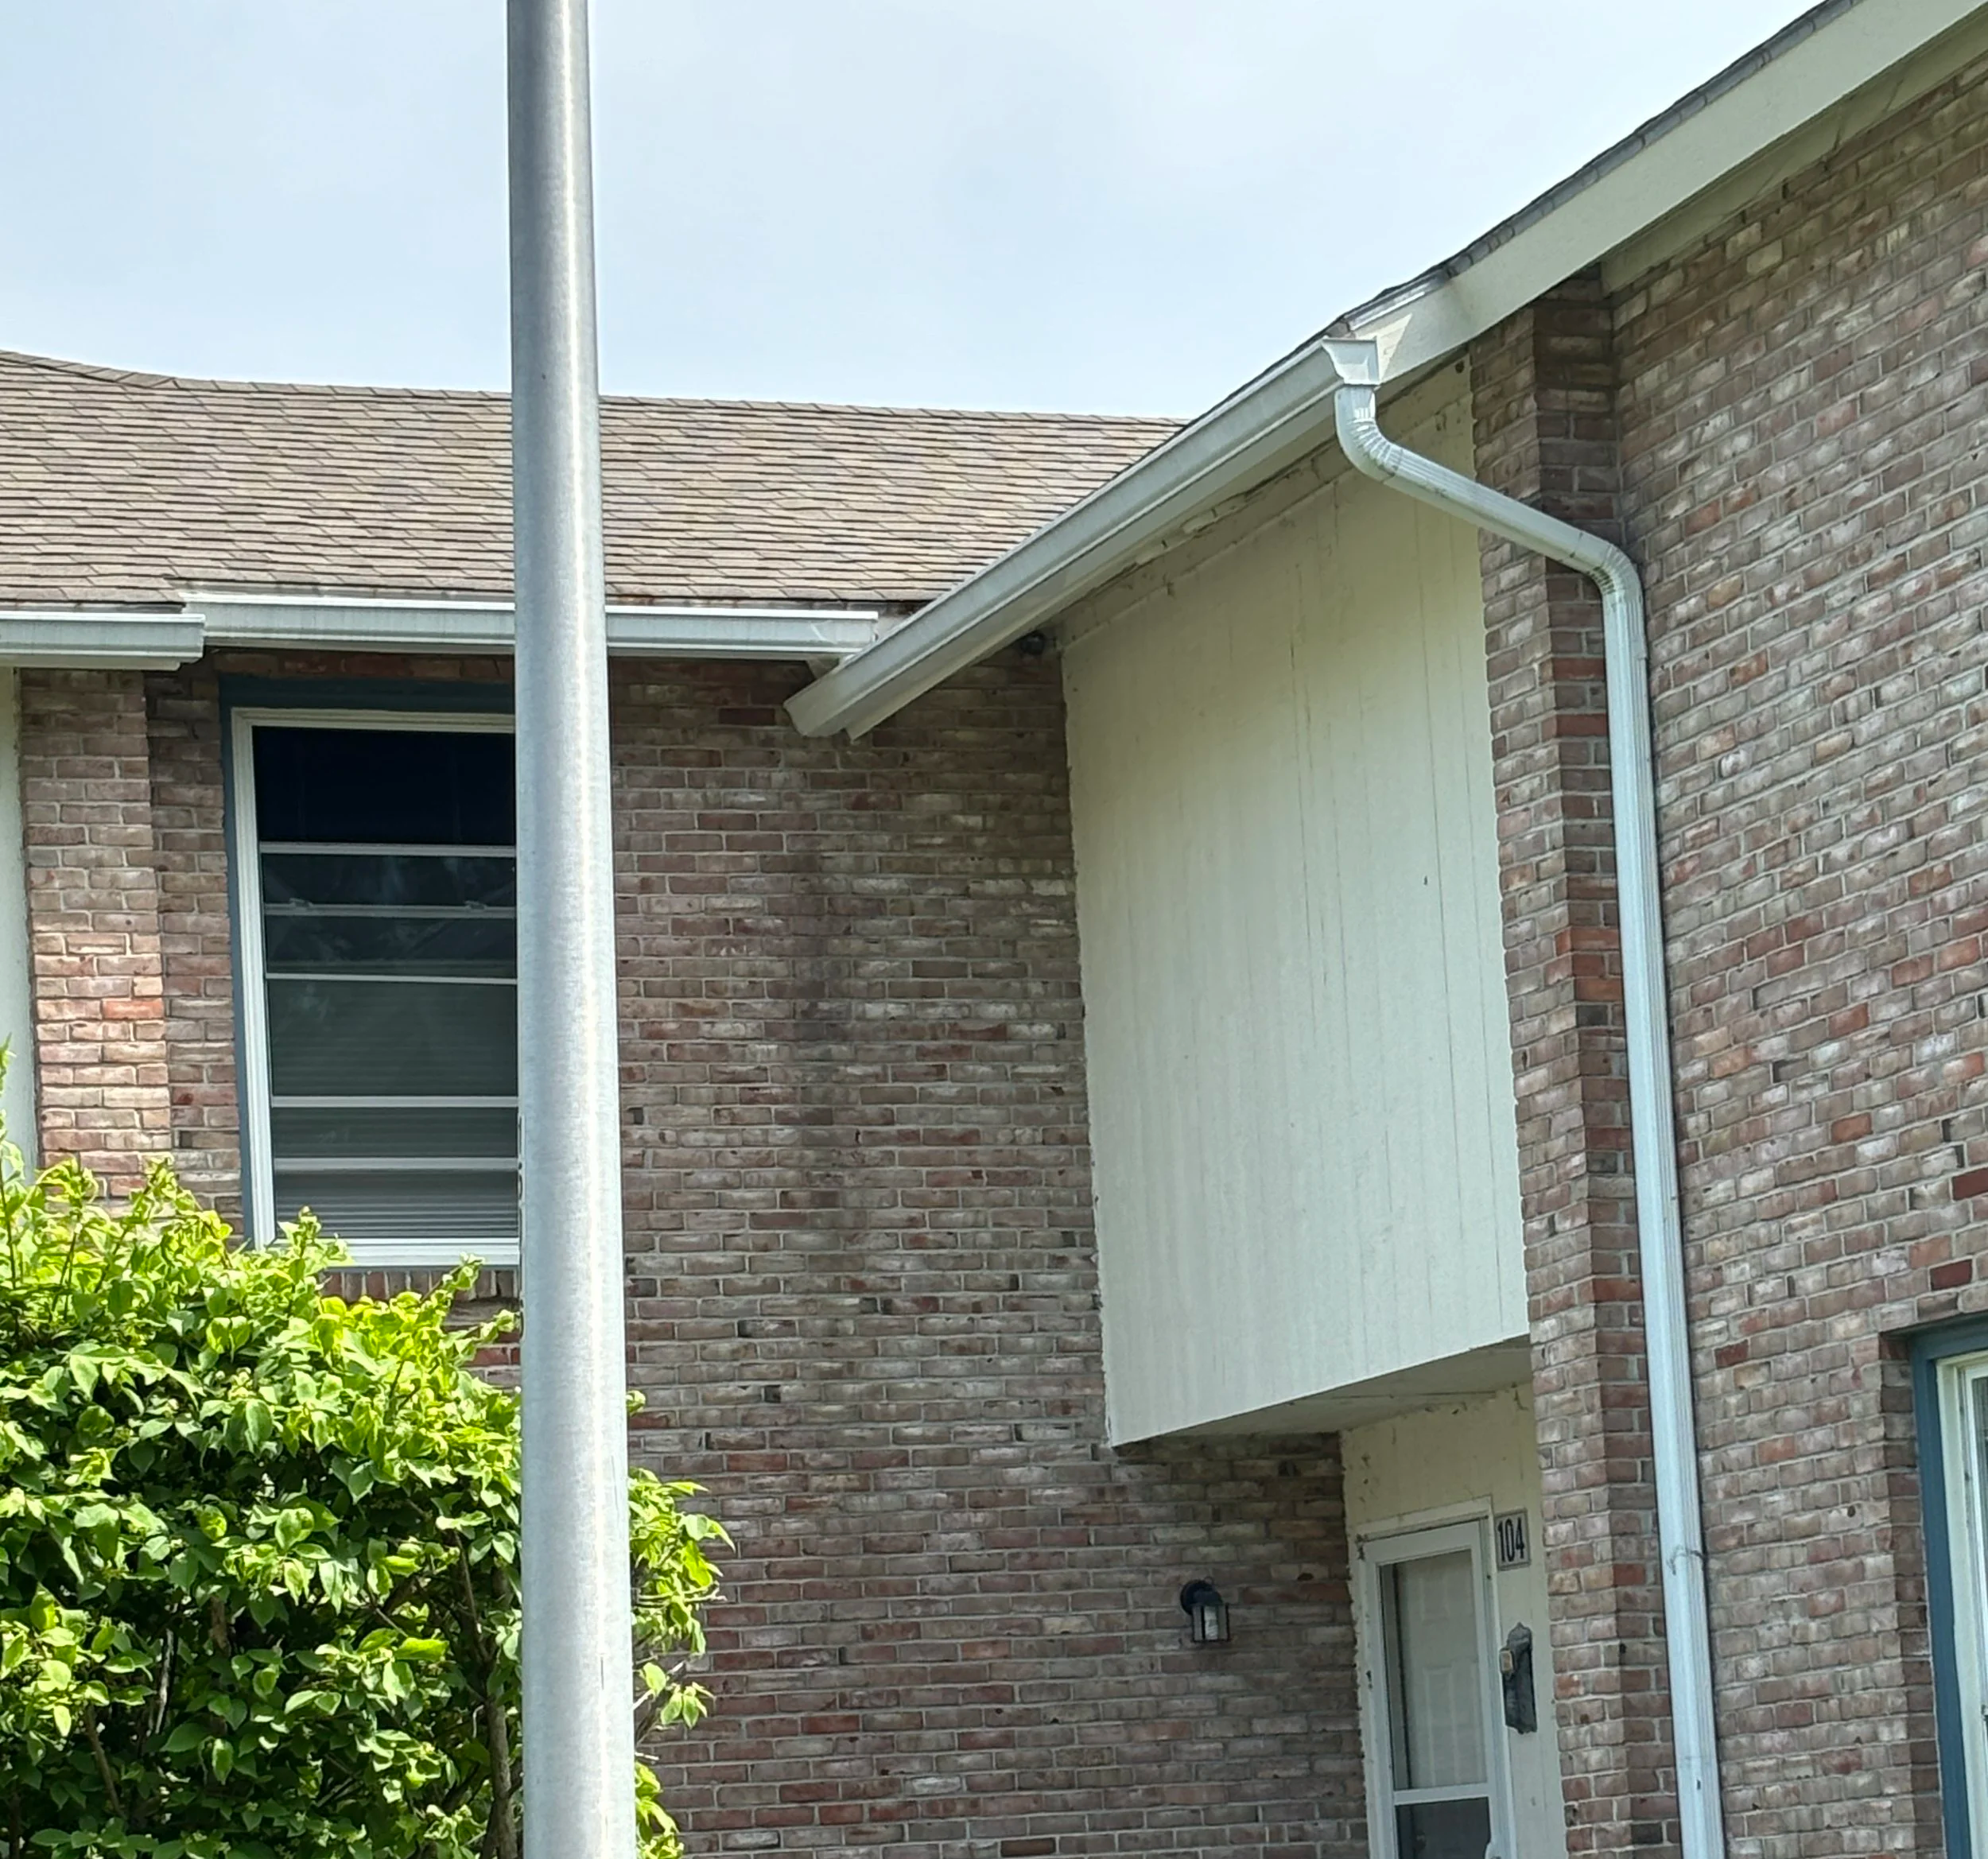
d.) Check that gutters do not run directly into walls.
Gutters should have end caps and should not terminate against siding or trim. There should be a small gap between the gutter end and the wall to allow drainage and drying. The image below shows staining on the brick siding from this issue.
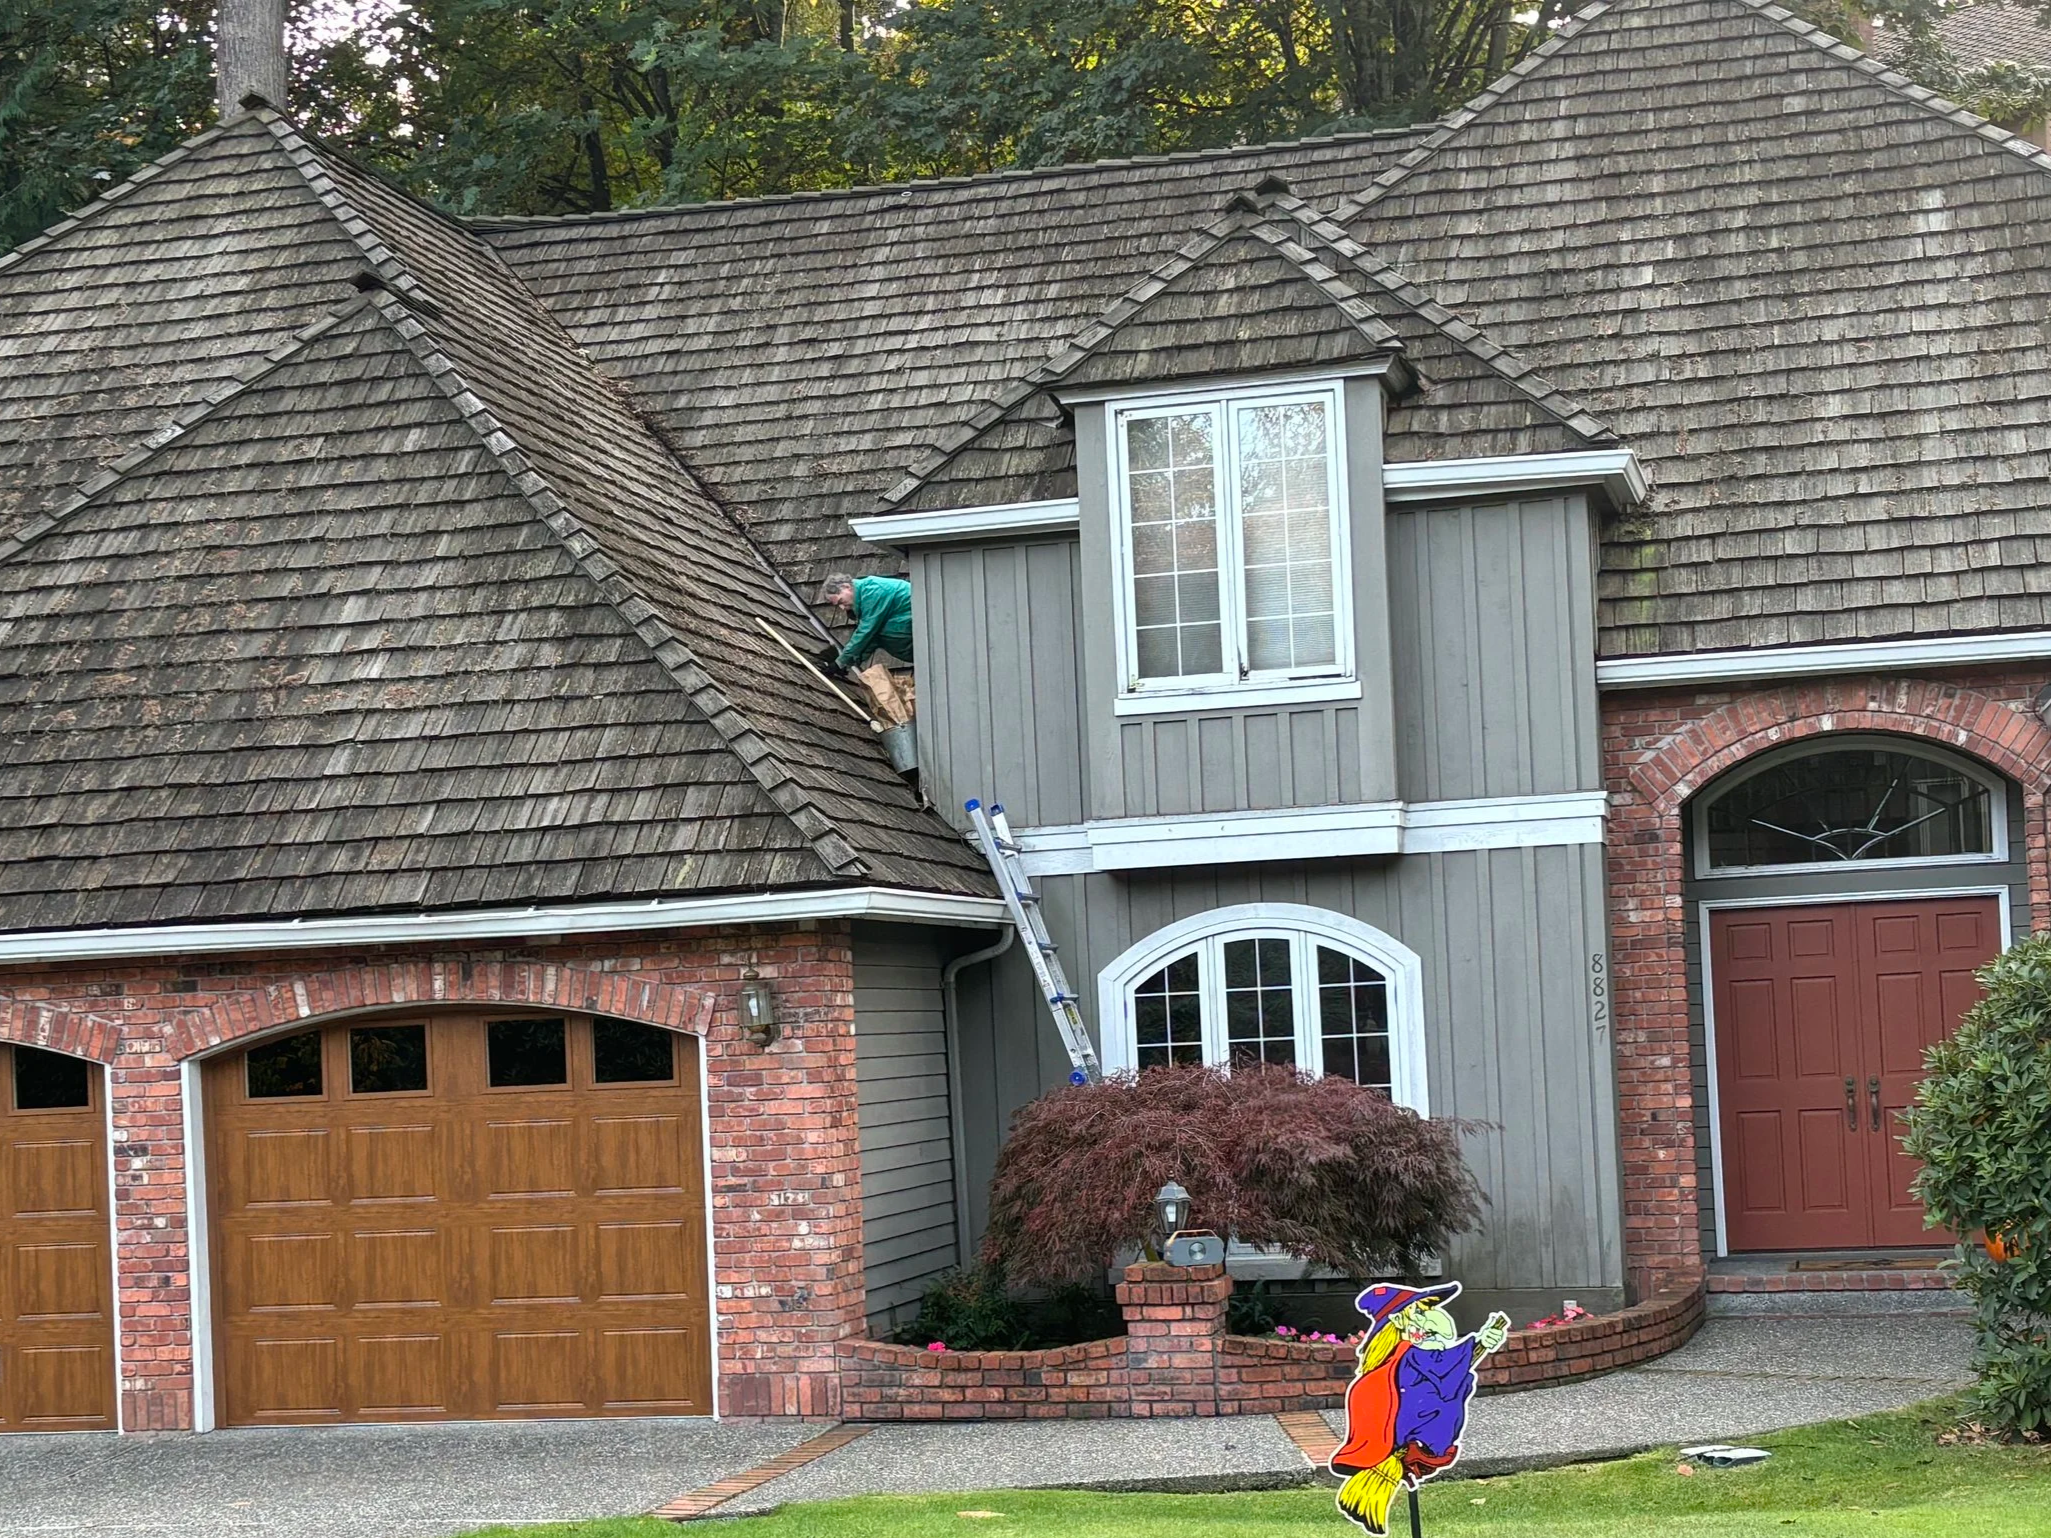
Fifth, inspect the roof:
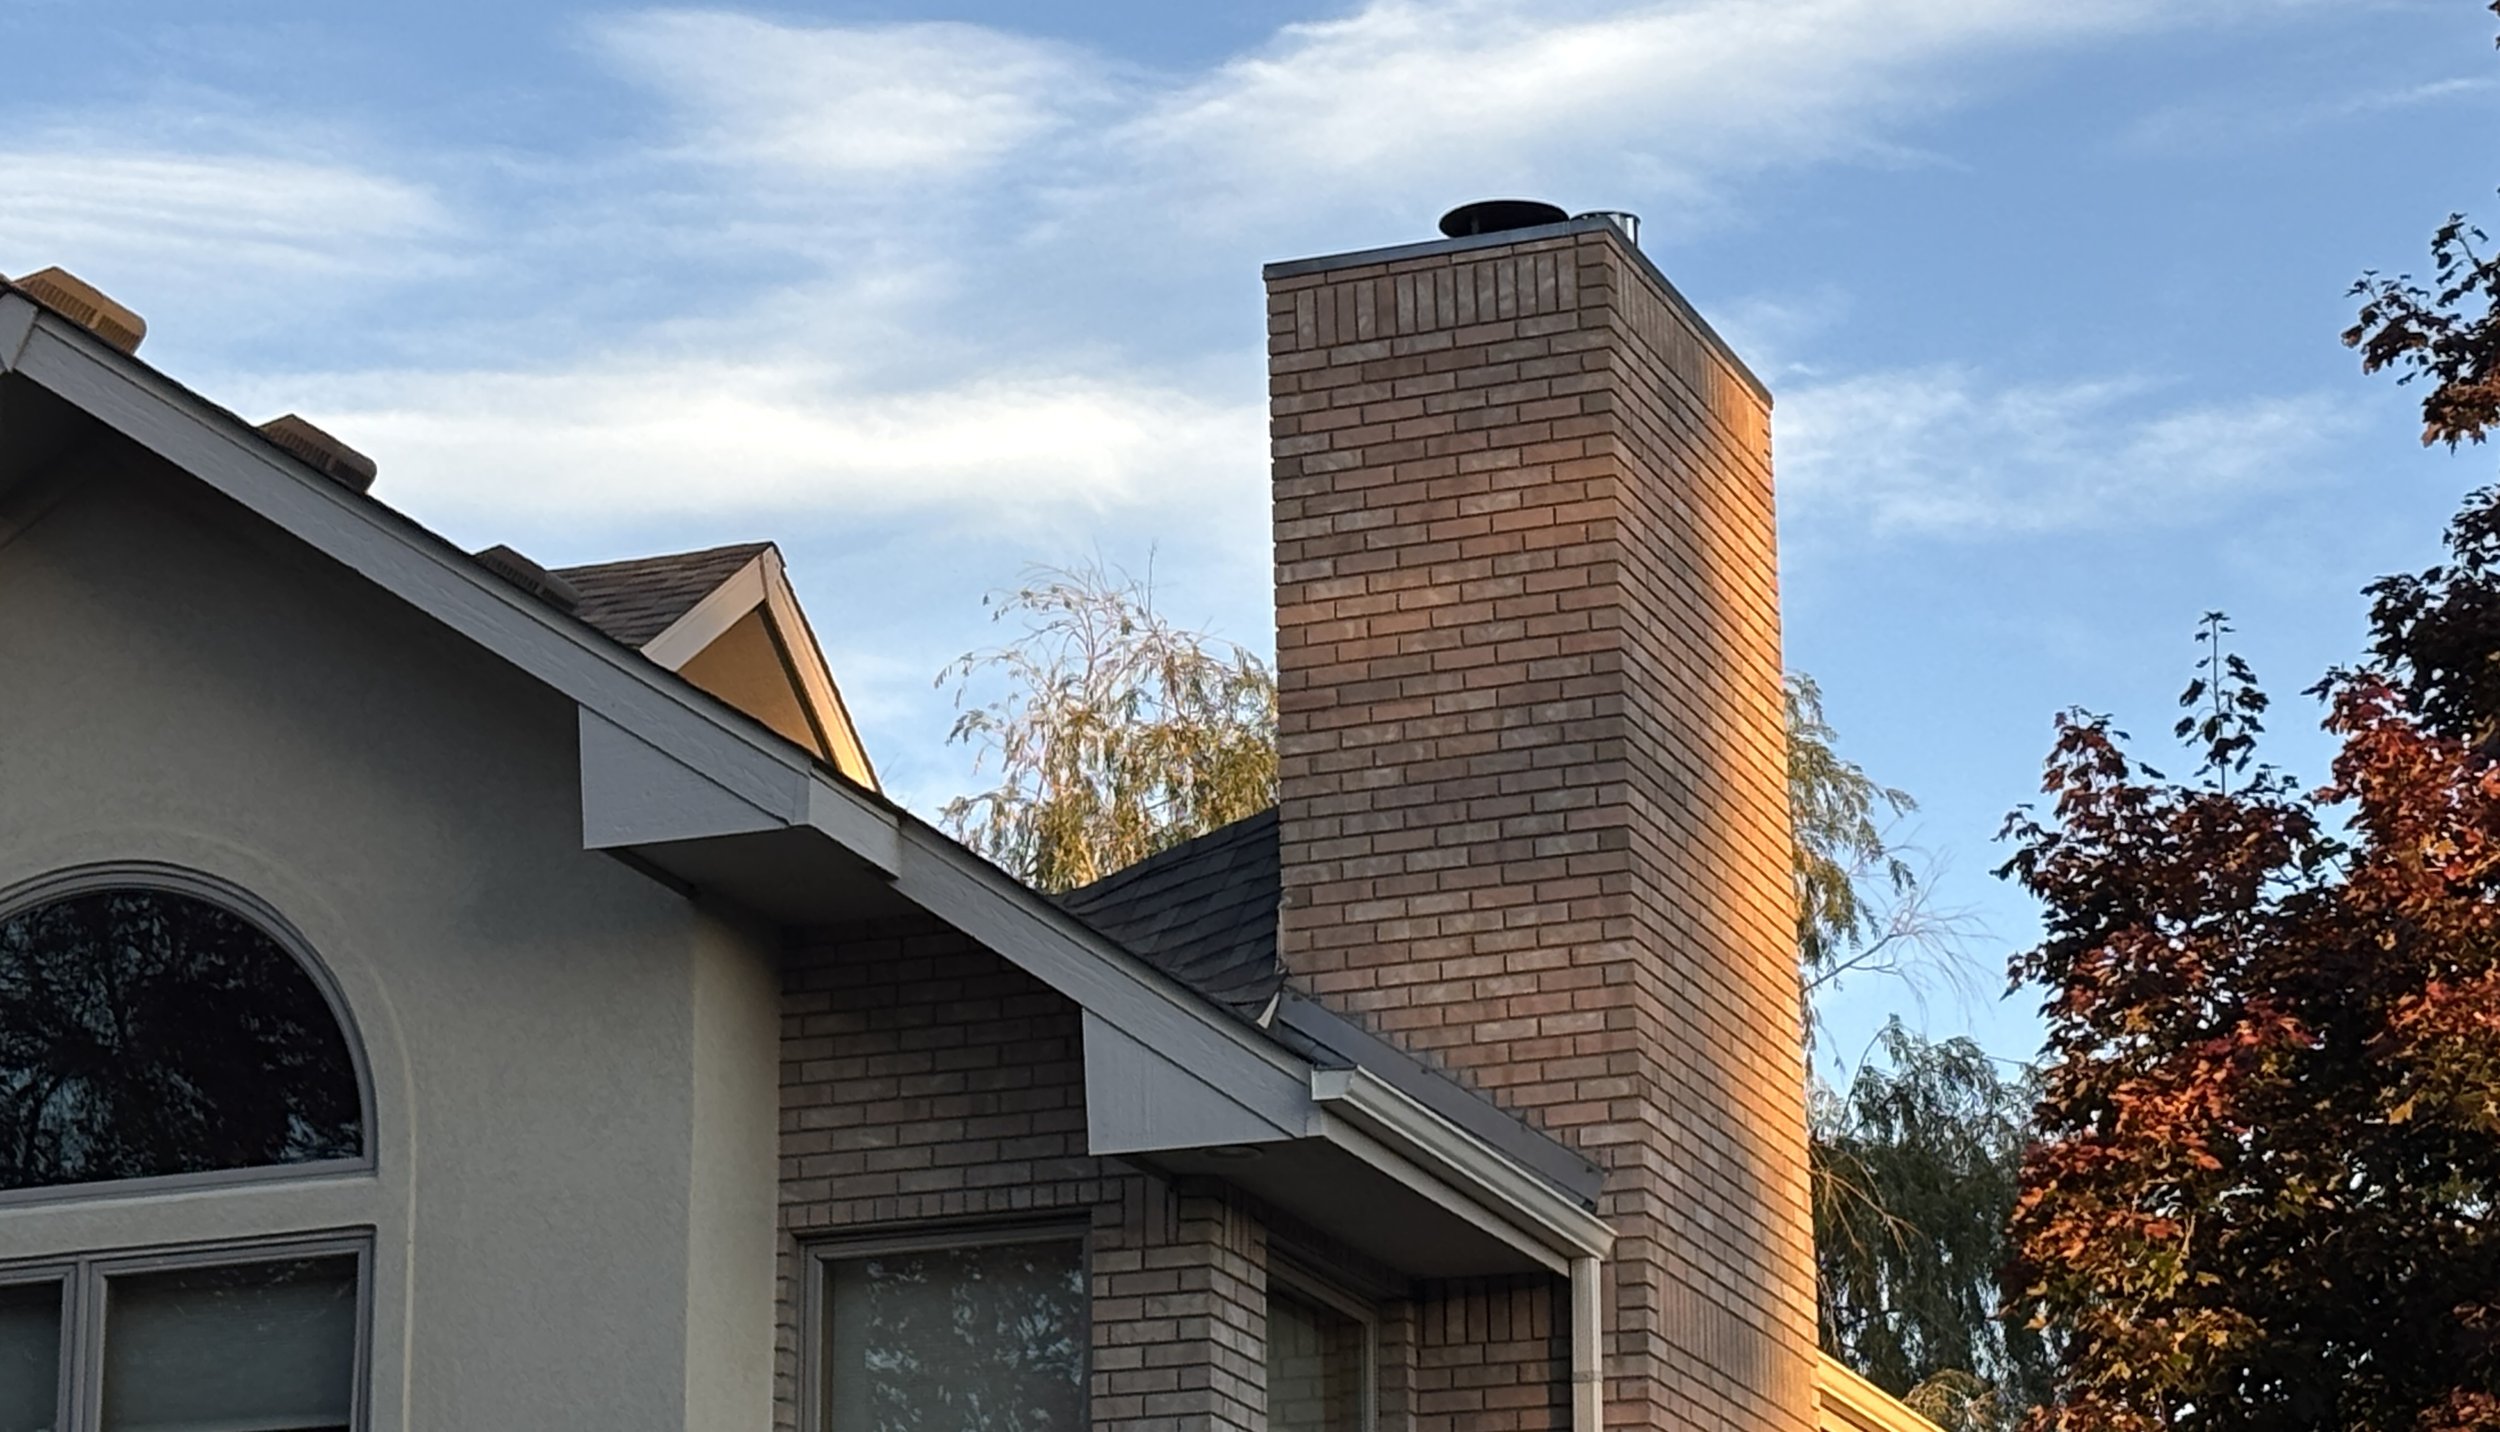
a.) Chimneys should ideally be located at (or near) the roof peak, as in the image below.
If the chimney sits lower on the slope, it should have a chimney cricket (apex) to divert water away from it, and flashing to protect its base as in the image below. Without these, water can pool or flow against the uphill side, causing leaks and internal water damage.
b.) Check whether there’s moss growing on the roof, missing or deformed shingles, etc.
Moss can be a sign that the roof stays damp for prolonged periods, and is potentially leaking.
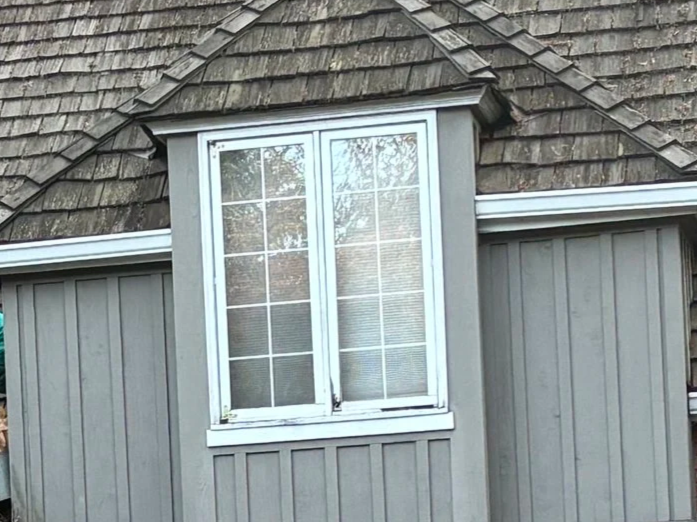
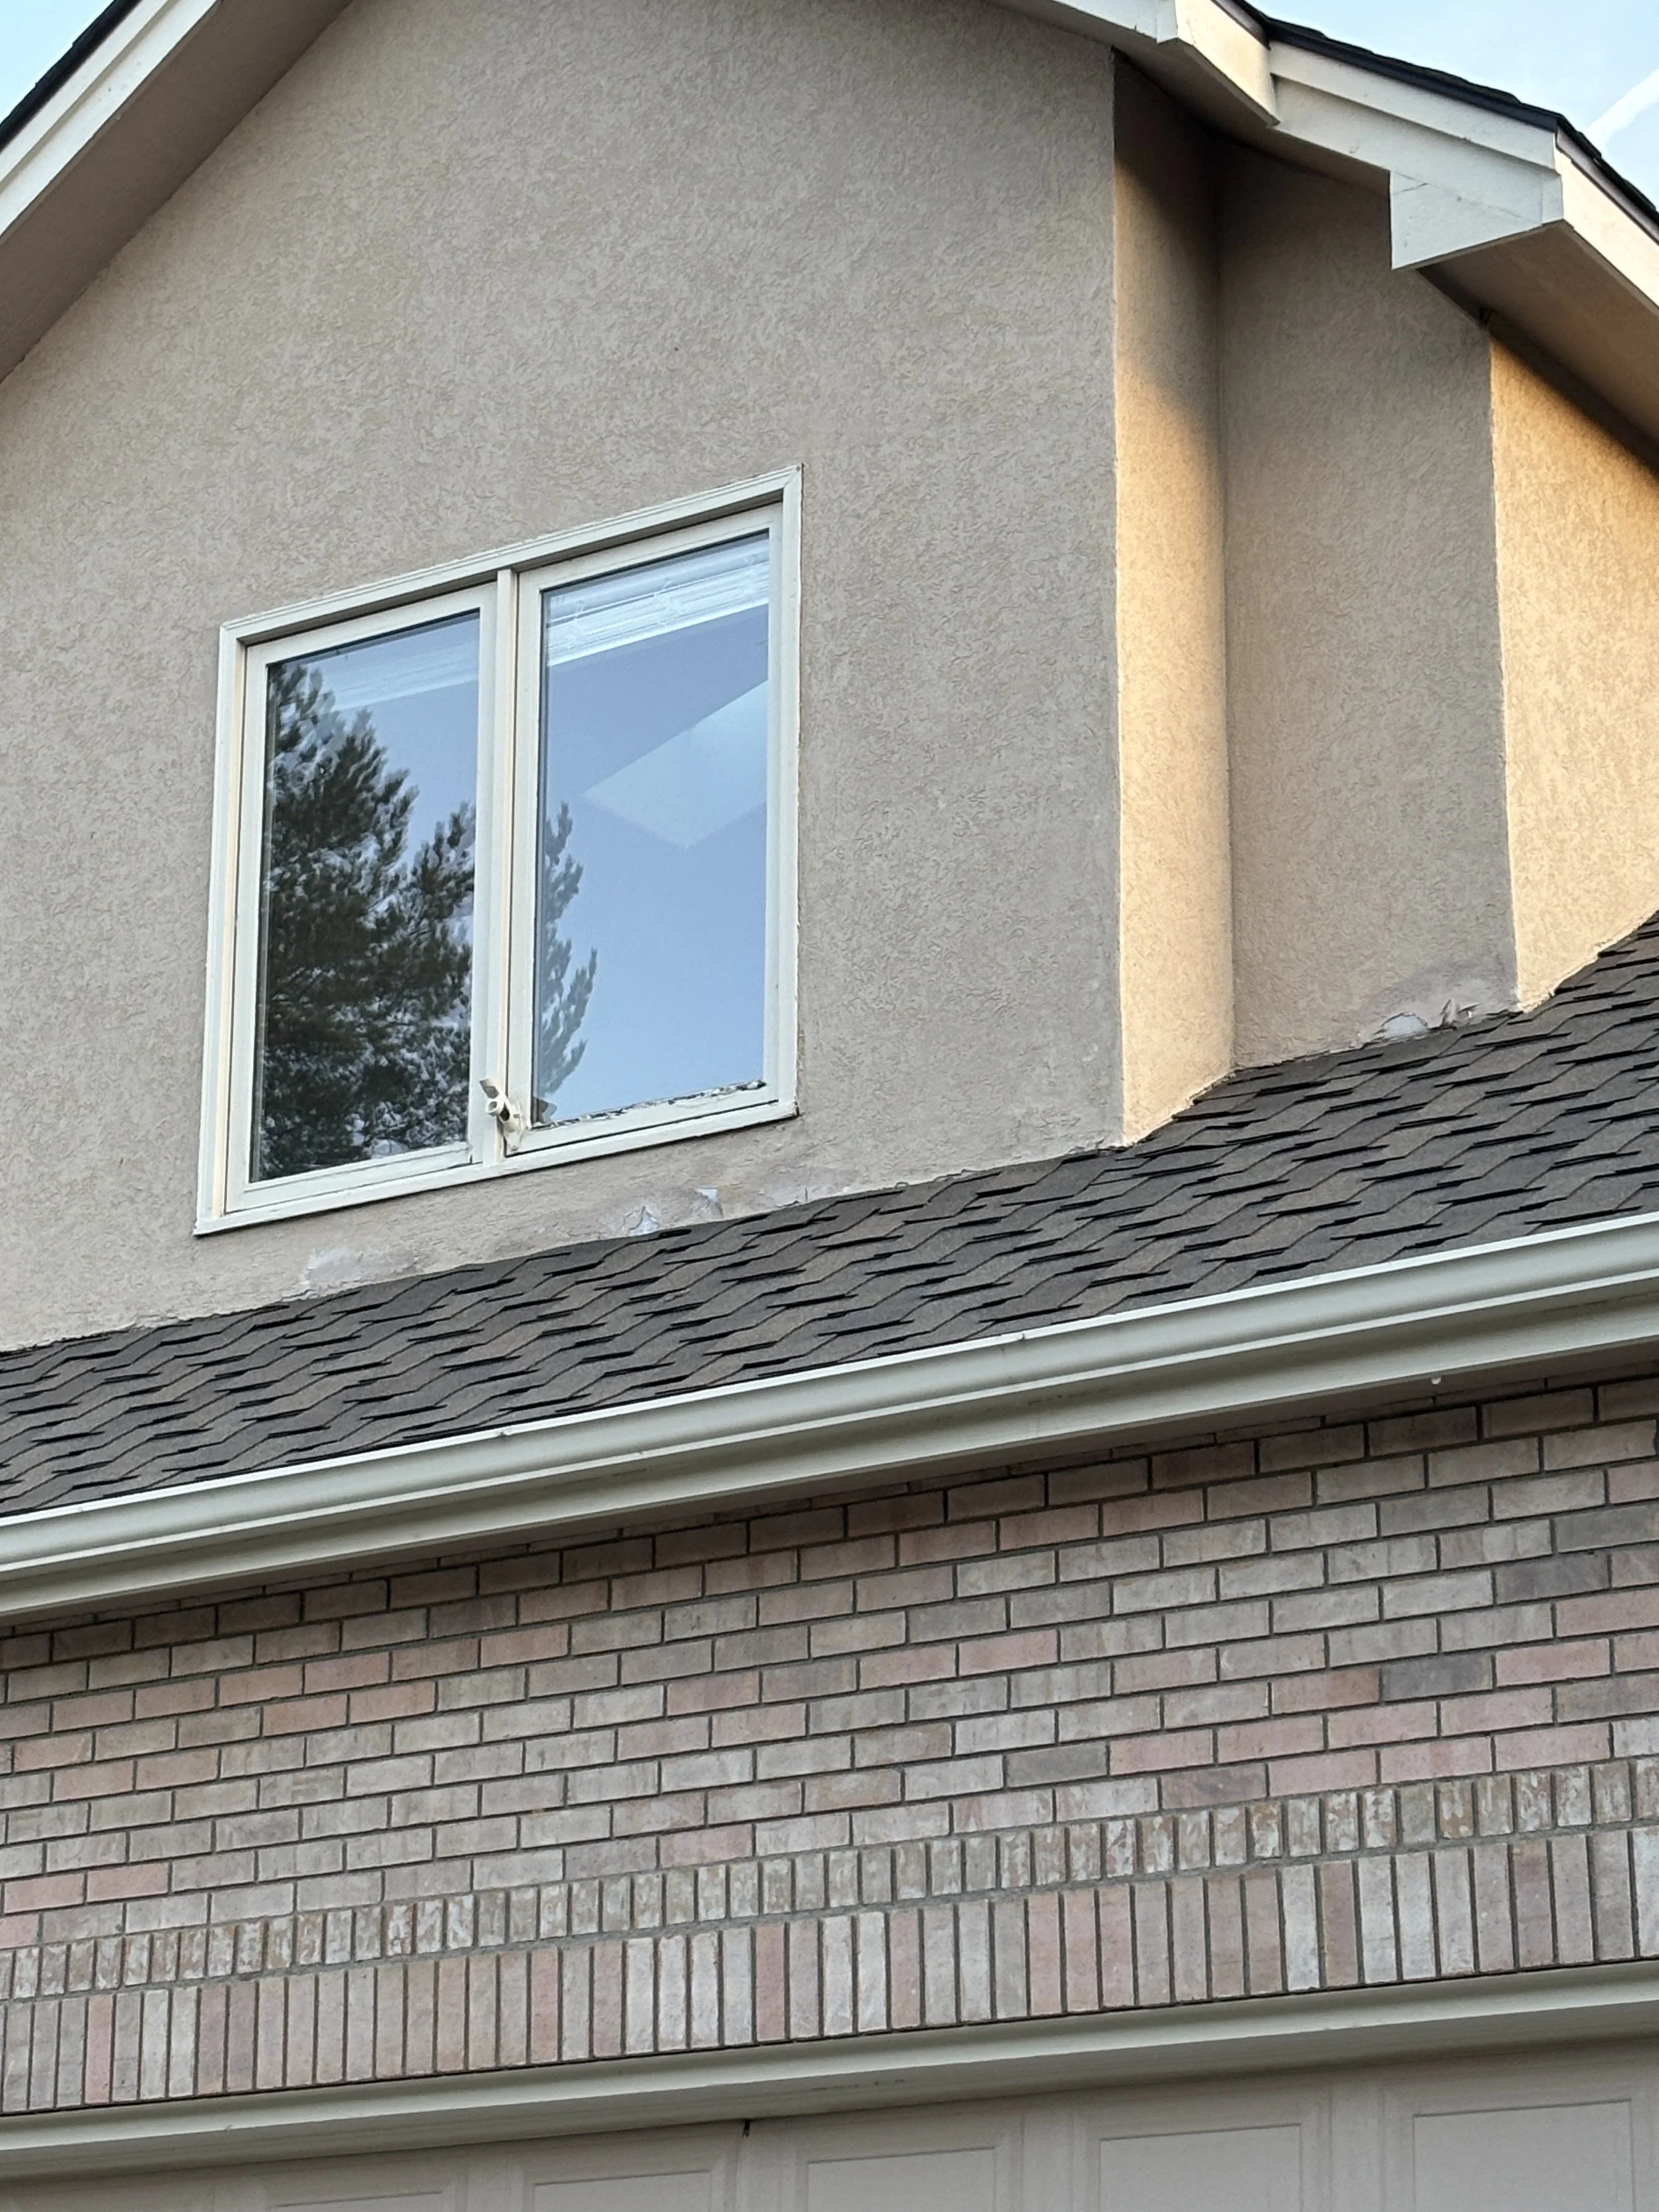
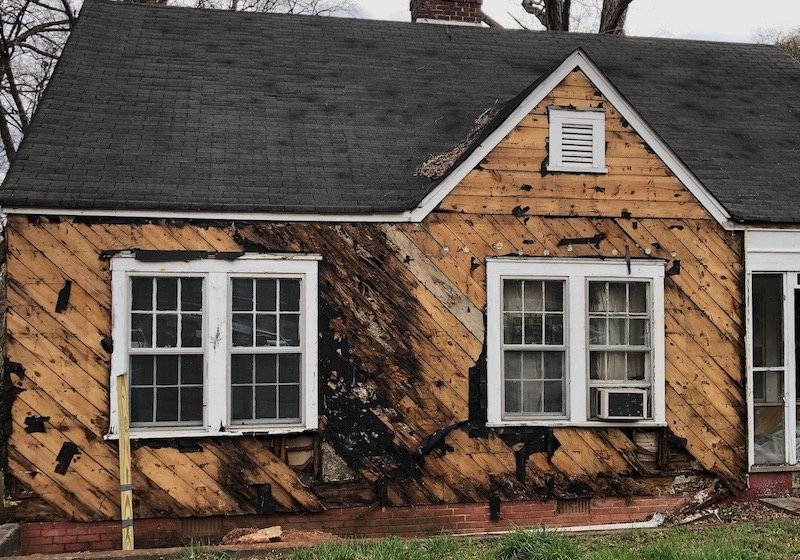
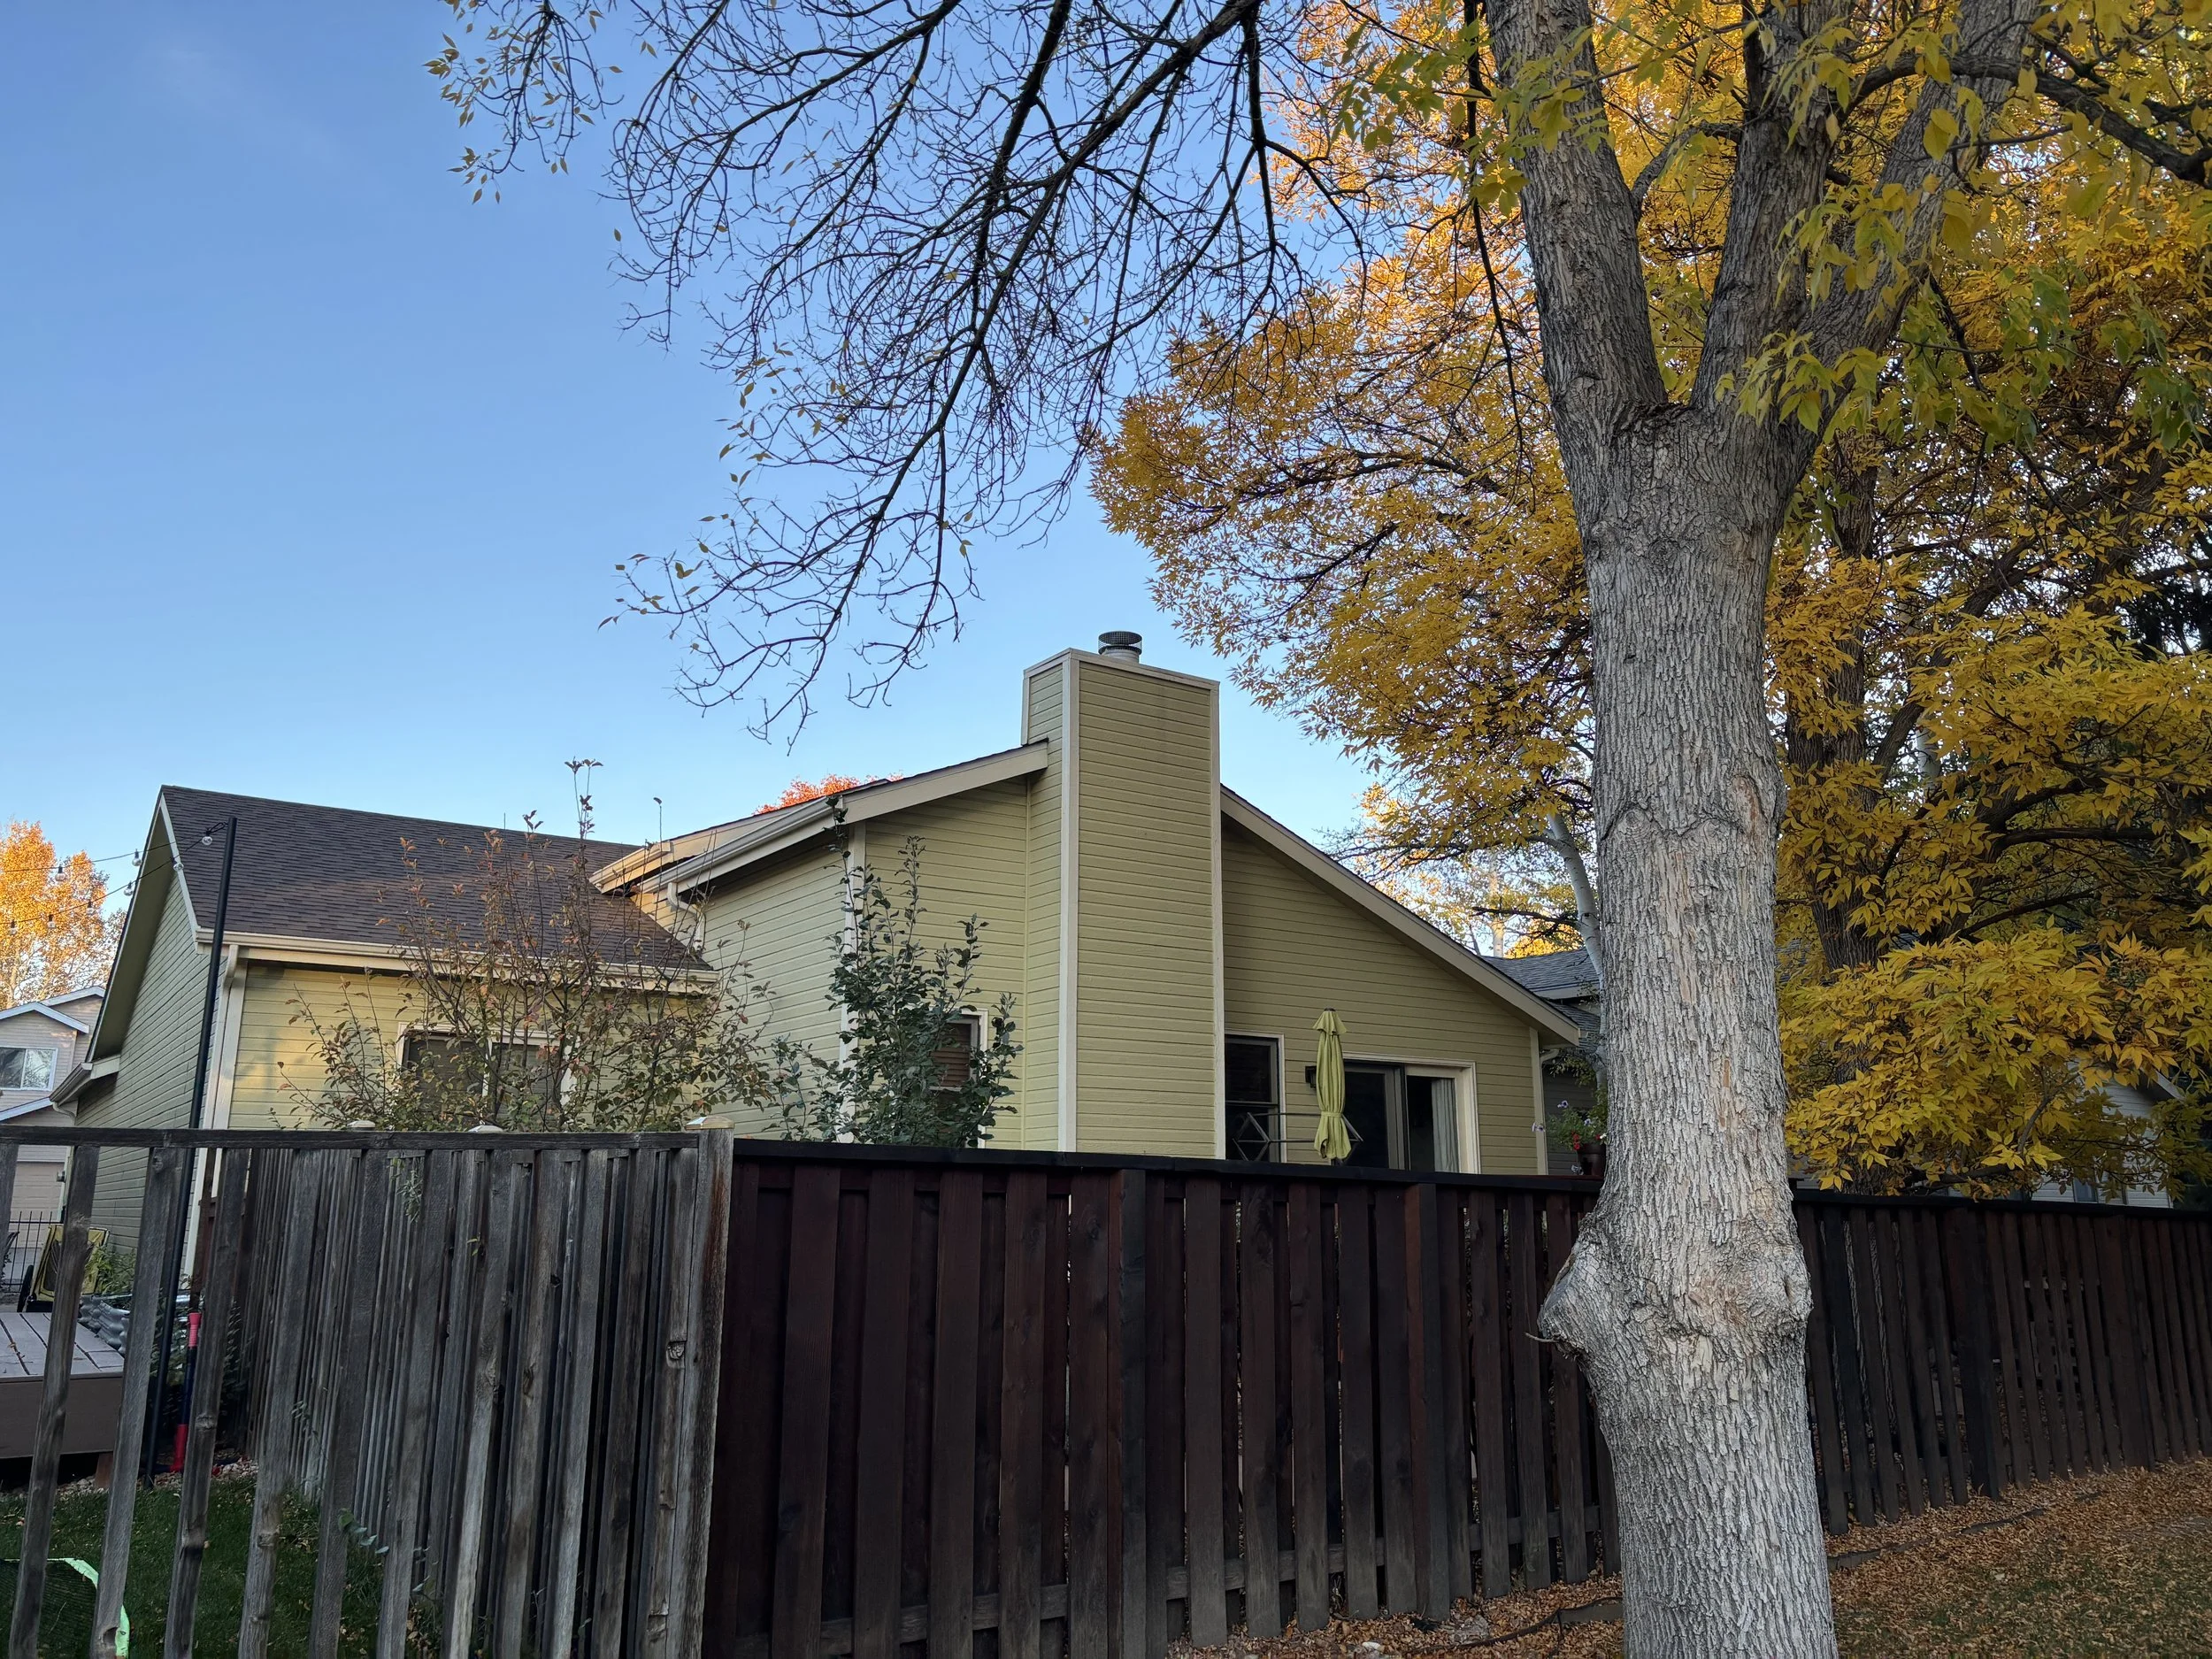
c.) Check the complexity of the roof architecture.
Simpler roofs are better to prevent water buildup. One architectural mistake to look out for is if your roof slopes downward and intersects a wall, as in the two images below. This can cause water to saturate that wall. It’s often a sign that the architect didn’t have proper training.

Interior Visual Inspection
Before you inspect, learn the classic signs of water damage.
Why learn the signs?
Where there are these signs, there is almost always mold, even if you can’t see it, and even if moisture meters and infrared (thermal) cameras don’t detect it. Contrary to popular belief, a mold problem usually doesn’t appear as the classic black splotches you’d expect. It’s almost always hidden below a material’s surface that has the following signs. A leak is rarely just a leak, as mold can start growing within 24 hours. Think of how much can grow in a slow leak that has gone unnoticed for years. Another point: not all toxic mold is black. It can be many different colors.
What are the signs?
Staining:

Bubbling:

Cracking:

Peeling:

Rust:

Swelling/bowing:
And efflorescence, which usually presents as a whitish residue from water carrying salts to a material’s surface:

First, catalog your initial impression the moment you walk in:
a.) Notice how the space smells.
After walking inside, I try to notice my first reaction to being in the space. What do I smell? Is it musty? Filled with fragrance? Do I feel off? Your first reaction is arguably the most important thing to pay attention to. You’ll get used to the smell quickly if you’re not quick to it.
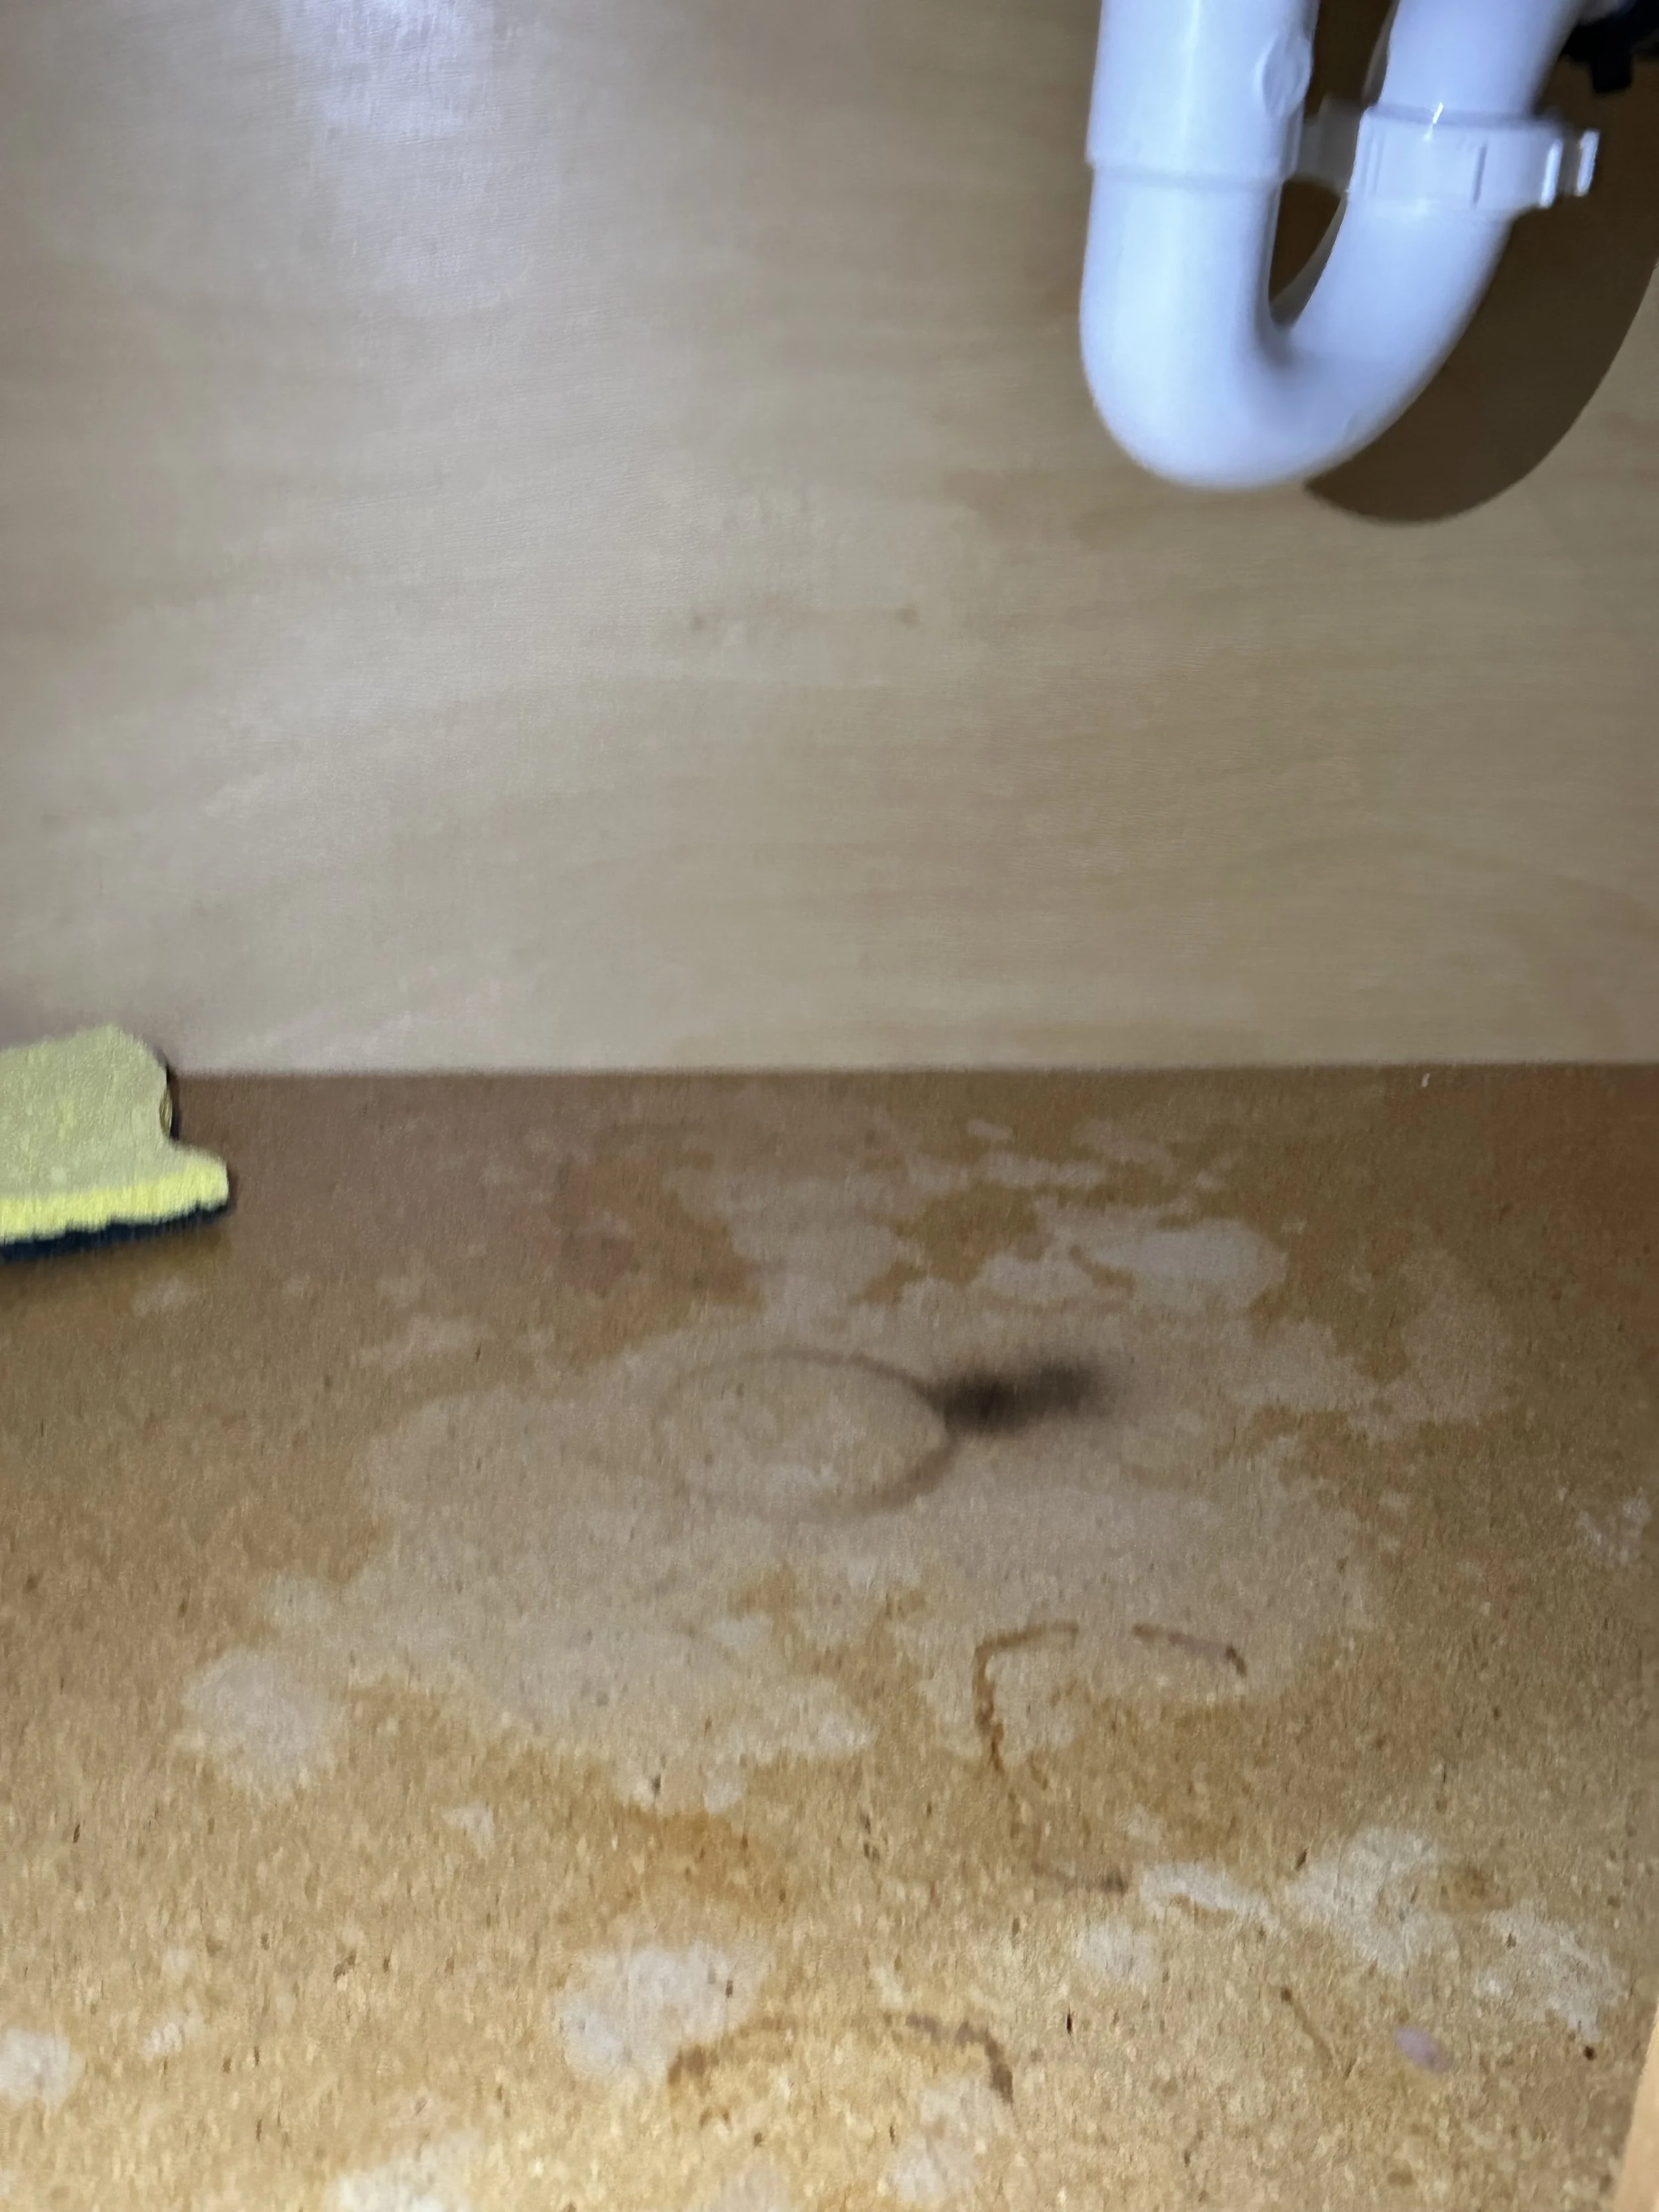
Second, inspect places to which water flows through plumbing:
Go to the kitchen
a.) Check in the cabinet under the sink.
b.) Check around the bottom of the dishwasher.

c.) Check that an exhaust system (either a microwave exhaust or range hood) exists.
Research shows that cooking produces an immense amount of harmful particles and gases. A working kitchen exhaust majorly reduces these. Sometimes there’s a range hood, sometimes there’s a microwave exhaust. Unfortunately, microwaves often don’t exhaust outdoors.
To verify whether the microwave exhausts outdoors, check for a duct in the cabinet above the microwave.

Go to the bathroom (not literally)
a.) Check in the vanity under the sink.

b.) Smell the sink drain.
Is it producing any earthy or fecal odors? If so, there may be bacterial buildup in the p-trap.
c.) Check around the base of the toilet.

d.) Check the baseboard below the toilet supply valve.

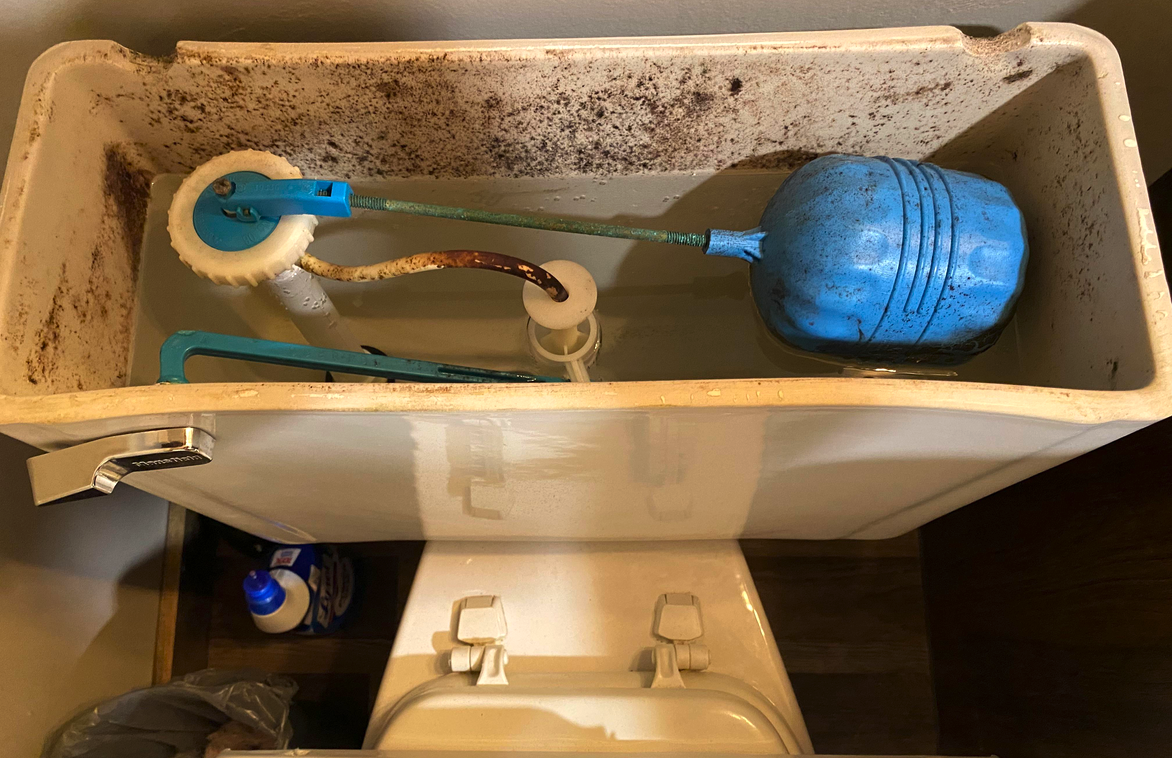
e.) Check inside the toilet tank.
Lift the lid and look inside the toilet tank (not just the bowl) for visible black, green, or slimy microbial growth. This may indicate that the home has hidden mold growth in other areas. Microbial growth in the tank can aerosolize during flushing and suggests broader air or water quality concerns.
f.) Check the shower area.
Especially the area of the threshold closest to the showerhead.
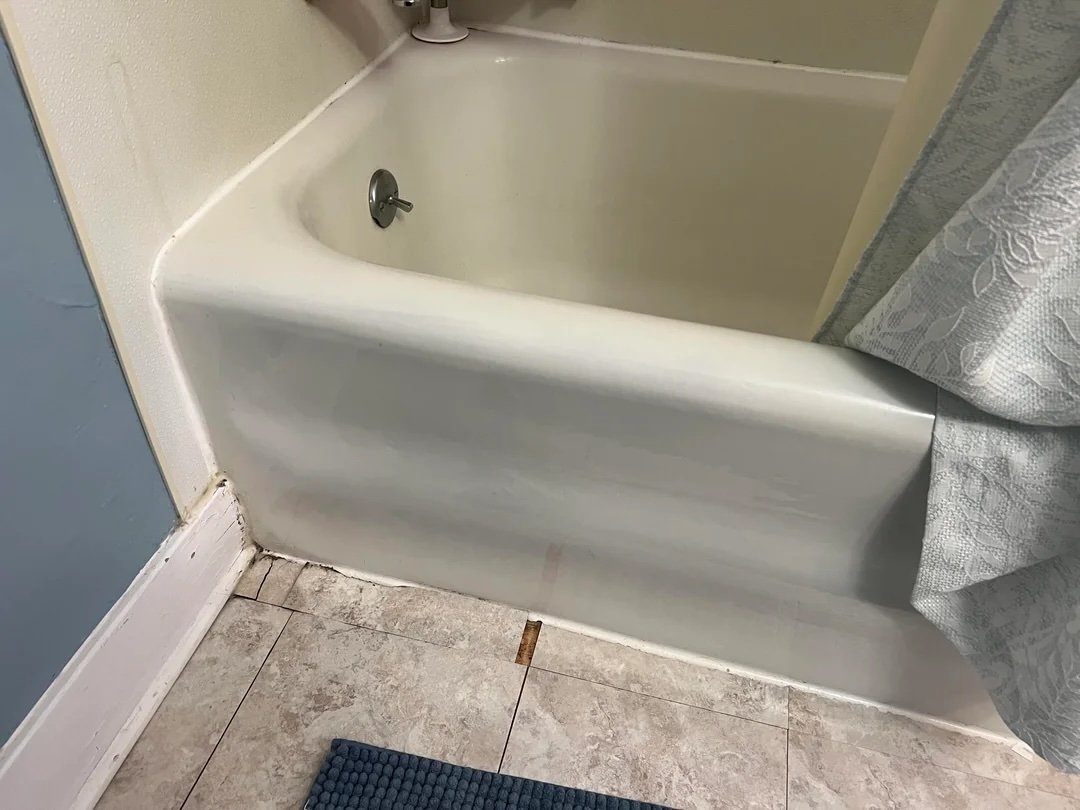
And where the wall meets the ceiling:

g.) Check the bathroom exhaust fan.
If you have time, turn it on and put a square of toilet paper on it to see if it actually is pulling air in. The toilet paper should stick to the vent.
Check that it vents to the outside - sometimes these fans can vent to the attic, which will cause moisture to accumulate and result in more water damage.

Go to the washing machine
a.) Check the floor around/below it.
The wall behind it near the supply valve
Smell the washing machine drum
Is it producing any earthy or fecal odors? If so, there may be bacterial buildup in the drum.
Smell the standpipe (where the washing machine drains)
Is it producing any earthy or fecal odors? If so, there may be bacterial buildup in the standpipe.
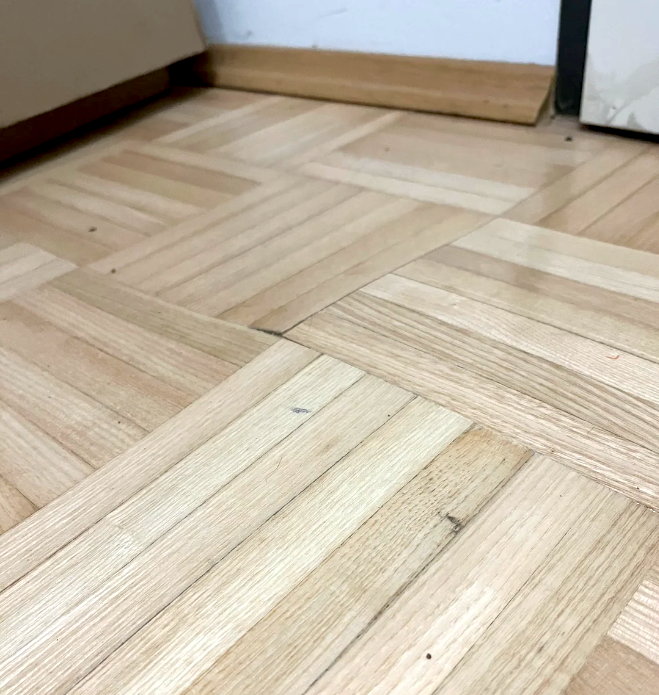
Third, inspect windows, doors, ceilings, and floors:
a.) Check the windows.

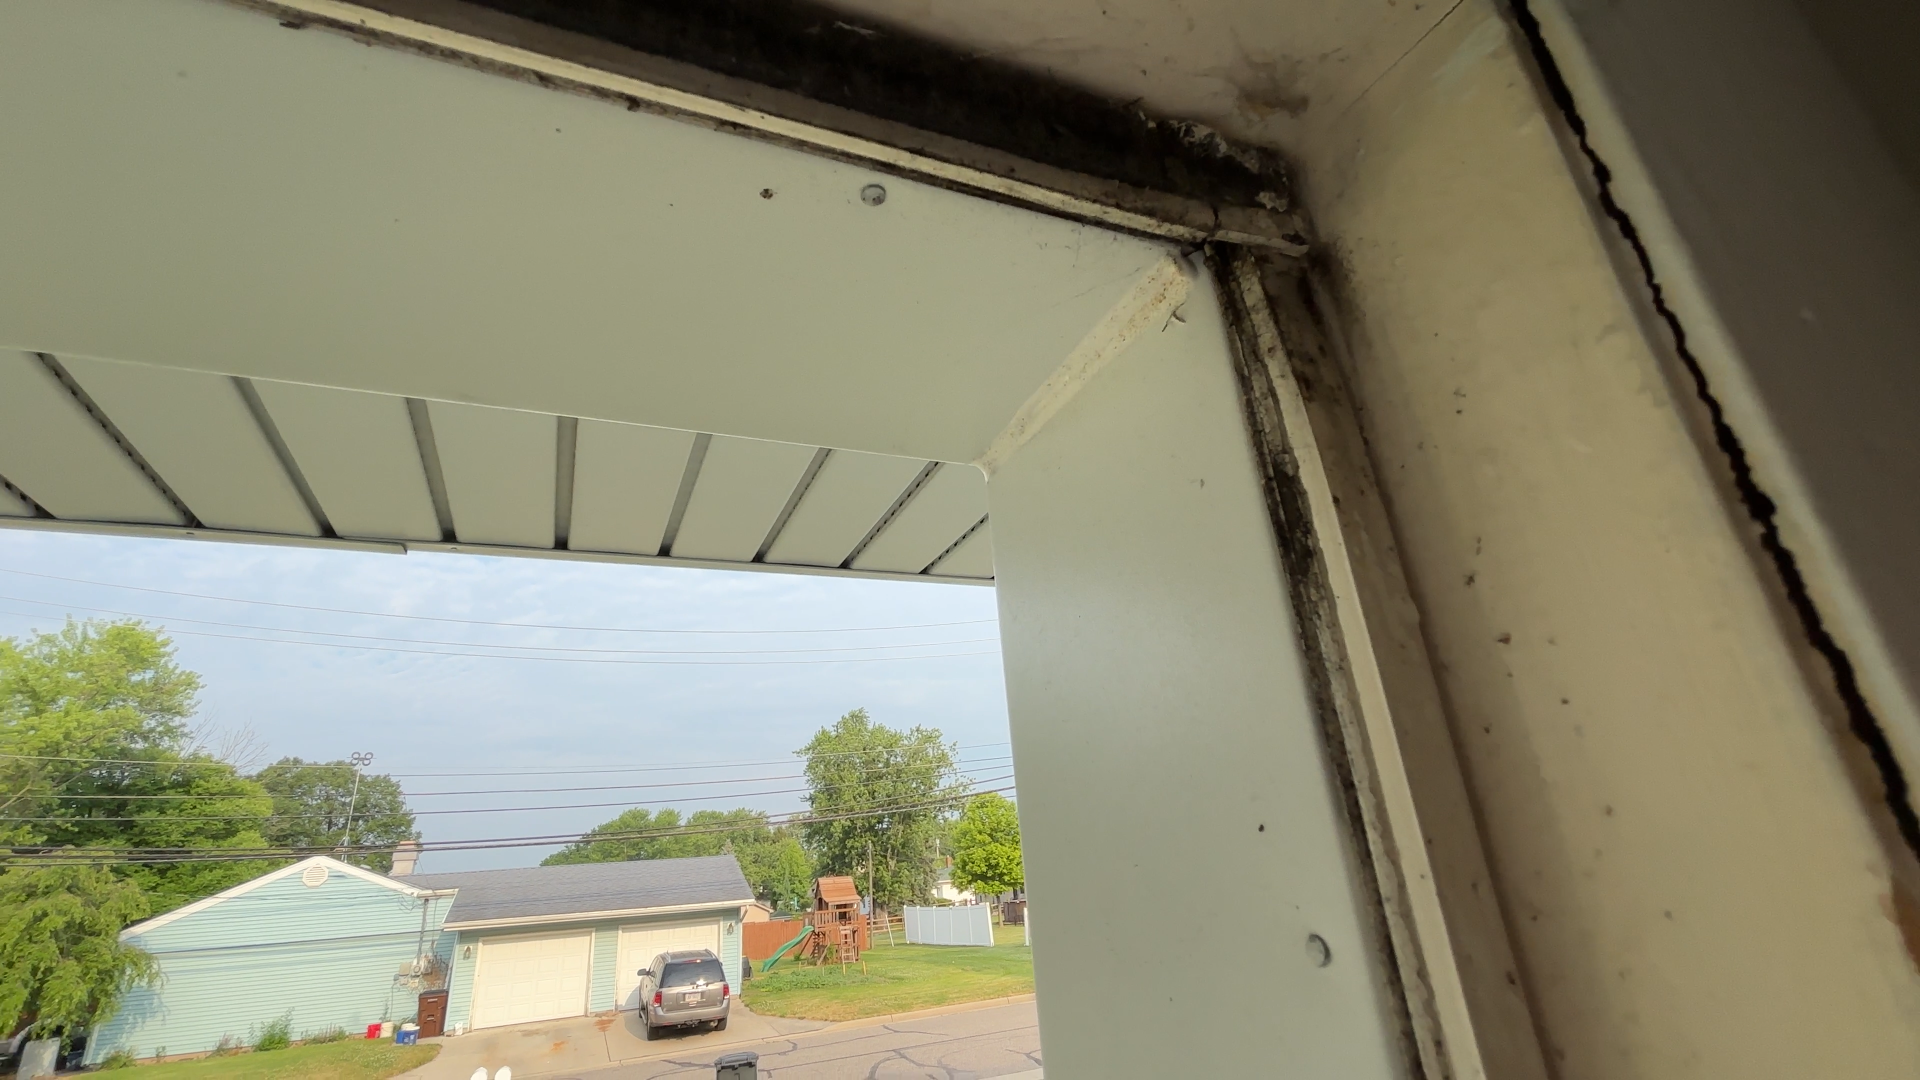
b.) Check the external door frames.
c.) Check the ceilings.

d.) Check the carpets.
The worst case scenario is if the carpets are old, smelly, stained, and high pile. Carpets can spew a lot of particulate and mold spores/fragments into the air when they’re walked on.
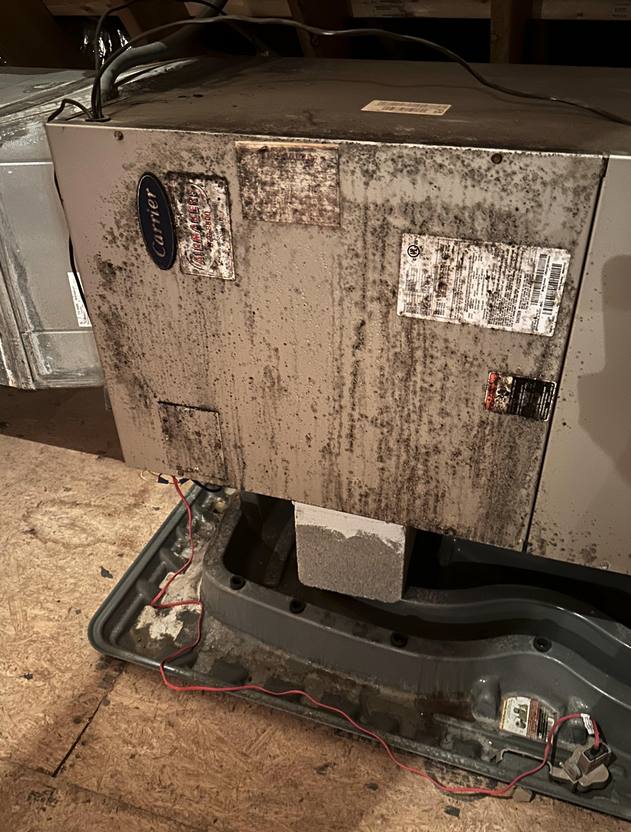
Fourth, inspect the HVAC system and water heater:
a.) Check the HVAC system and water heater for signs of leaking.
Check the walls around it, floor under it, and the drain pan for microbial buildup.
Check for corrosion and rust, as this is a sign of lingering moisture.

b.) In humid climates especially, HVAC systems should be located within the conditioned space.
Air handlers and ducts should not be installed in hot, humid areas like attics or unconditioned garages. These locations promote condensation, mold growth, and negative pressure that draws contaminated air into the home. Placement in a conditioned basement is acceptable.
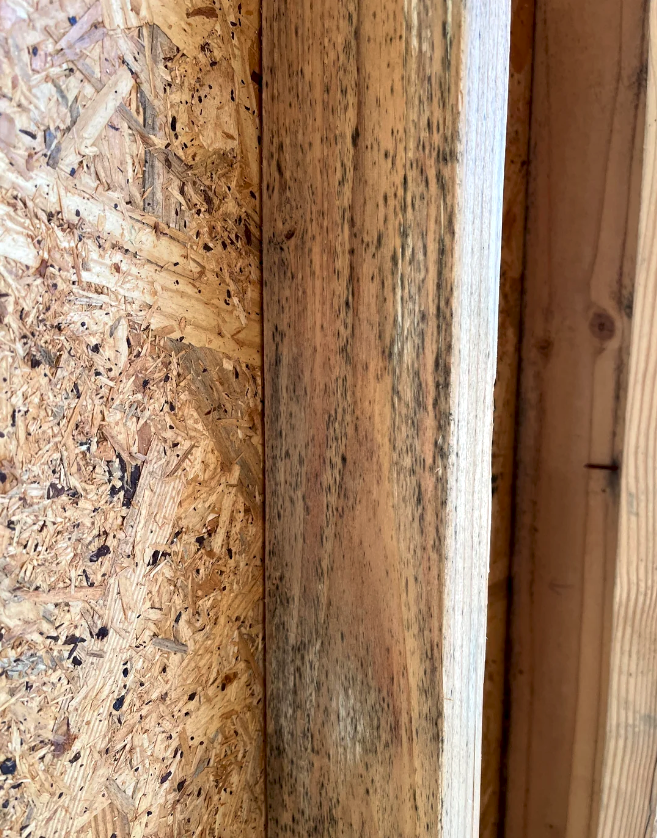
Fifth, inspect the unfinished spaces (garage, crawlspace/basement, attic):
a.) Especially focus on inspecting the exposed wood (structural framing) there.
Does it have microbial discolorations such as black splotches, off-white buildup, etc. Basically anything that indicates that the wood may have been wet for a long period of time.
How do you know when to walk away from a home based on this inspection method?
That can vary significantly based on the overall quality of homes in your area, your budget, timeline, and how environmentally sensitive you are. You’ll get a feel for this as you search for homes yourself. While I tried to make this list of features as comprehensive as possible for quick inspections, it’s not exhaustive.
Keep in mind that visual inspection can’t catch everything. Landlords or inexperienced house flippers can mask water damage by repainting and remodeling, hiding it rather than properly remediating the source. I’ve heard that called “lipstick on a pig.” Seeing the phrases “newly remodeled,” “updated,” or “freshly painted” in a listing isn’t necessarily a good thing. Another limitation is that water damage can occur in spaces that aren’t visible, or in places we can’t always access during a quick inspection.
Still, visual inspection is the most powerful method for identifying mold risk. It is known to find mold where other methods (air sampling, moisture meters, and infrared cameras) fail. Visual inspection is also much quicker, easier, and cheaper (it’s free). Other testing methods such as MSQPCR dust testing (ERMI) also aren’t as feasible when looking for rentals. Air sampling, moisture meters, and infrared cameras often give false negatives; they make you think everything is okay when it isn’t. That being said, every testing method has its place. Each can give you information that the others cannot. But the foundational method, the one that every health-conscious inspector starts with, is visual inspection.
If you’re seeing water damage red flags, there’s a high likelihood of hidden mold, since mold can start growing within 24 to 48 hours when materials stay damp. Generally, the more water damage indicators (red flags) you see, the more unhealthy the home is. Also, some red flags are worse than others. Use the companion checklist to automatically count red flags by severity. For help using the checklist, refer to the quick-start guide included with this download.
So what are your options if you see red flags? Well, if you’re on a home search, you can walk away. If you already live there, you can either bring in professionals to test and remediate, use my strategies to reduce your exposure, or move. If you need further guidance, feel free to book a consultation with me here.
Of course, there’s always a chance you’ll miss something, but this is about probability. I promise you, there are plenty of homes without significant water damage. Those who can visually inspect have a higher probability of finding one.